Tuesday, September 28, 2010

Drinking Dr Pepper in Dublin

Last week I paid a visit to the oldest Dr Pepper bottling plant in the world.  It is also the only place to still make Dr Pepper with pure cane sugar, not corn syrup.


Where is this magical place?  Dublin, Texas - about an hour and a half south and west of the Dallas/Fort Worth area.  It is not exactly a booming metropolis.  They were pretty excited to see someone with DC license plates visiting their town.


Why did I go there?  Well, to get some special Dr Pepper to make a Dr Pepper cake and enter it in a cake contest for the State Fair of Texas.  More on this later...


What is Dr Pepper?  Originating in Texas, it is a popular soft drink that was created to capture the many fruit, spice, and berry aromas of a soda fountain.  The company's marketing logo is 23 flavors in one sip.  It has always been my favorite soft drink, and I'm glad it is becoming so widespread.  When I first moved to the East Coast, Dr Pepper was really hard to find.  I loaded up several cases into the U-Haul with all my stuff, so I wouldn't have to go without.

Thankfully, it is no longer a problem for me to find as much Dr Pepper as I would like to drink.  The stuff they make in Dublin, however, is a bit more rare.  They have a limited marketing area and because of the old equipment, they don't make too much either.

Here's a look at the bottling equipment.  It is still in use today, but they only bottle about once a month.  The bottles you see on the machines are just for demonstration, because my tour guide thought it would help make for better pictures.  He was pretty tickled to have somebody to talk to, frankly.  They don't have many visitors on weekdays, so I got a private tour and was able to photograph the whole set-up.  All staff work the line and take turns providing tours and working the giftshop, so he was able to show me how each machine works.

This is a staging of the entrance of the original plant.


The bottles enter the bottling area, loaded by hand...


The bottles come out after being washed and are lined up by the machine and checked out by hand for chips or cracks...


Then they move along a conveyor belt and are filled with water and syrup...


Then, they are capped...


And shaken three times to mix the water and syrup.


Then, come out the conveyor where they are checked by hand on a light machine.  The light is a bit of quality control that ensures the right amount of syrup has been added.


Finally, they are packed into 6-packs and cases.


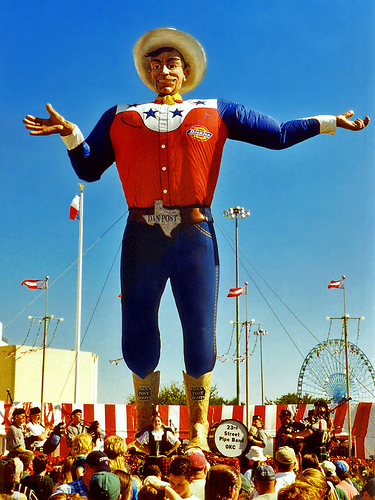
Stay tuned for my report on the Texas State Fair contest...

Monday, September 27, 2010

I Need Your Help Again

With your help, I made it to the second round of Project Food Blog, an interactive contest to discover the next hot food blogger.  Thank you for all your support.


We are not done yet, though.  I've submitted my entry for the second challenge, and voting starts today, Monday, September 27.

If you recall from last week, I advance to the next challenge by accumulating votes from the official judges, fellow Food Buzz Featured Publishers, and you.  Please visit my entry for Project Food Blog and submit your vote of support.  (You will need to join Food Buzz.)  If you like my entry, please ask your friends and contacts to do the same.

Thank you again, and I'm sure with your help, I'll be back for the third round.

Saturday, September 25, 2010

Texan Bulgogi with Bibim Bap

I started planning for round two of Project Food Blog before I even finished my entry for the first round.   I liked the idea of making a traditional family dish with the recipe coming from a friend.  I knew my friend, Virginia, could help.   She’s a terrific cook with a generous spirit.  I called her up and we brainstormed some traditional Korean dishes.  She helped me decide on bibim bap (mixed vegetables on rice) and bulgogi (marinated beef), something that her family often ate.

Now, for the shopping...I visited two Asian grocery stores within a few miles of our temporary house here in Fort Worth.  The vegetables, rice, and seasonings where easy to find, and it was fun to just wander down the aisles.  The butcher counter was a slightly different story.  

From my conversations with Virginia, I knew I was looking for very thinly sliced beef, and we both believed it would be fairly common to find.  Let me emphasize here that I am not at all squeamish, and I thought it was important in the spirit of the challenge to step outside my normal routine.  I was not deterred by the lack of labels behind the glass, the various animal body parts in plastic, or clerks who didn't speak English.  I walked slowly up and down the counter case, all along the freezer case, and back to the counter case.  Hmmmm...I didn’t really see what I wanted to find. 

I found one pile that looked like beef, and was thinly sliced, but it looked basically like scraps left from trimming more favorable portions of the cow.  Well, what the heck, the price was only $1.49/lb.  Note to my reader - that should have been my first clue.   Using sign language and pointing, I placed my order.  The clerk reached into the pile with his bare hands and dumped it by the handful into a plastic grocery bag to weigh, then placed it in another plastic grocery bag, knotted it, and handed it over.  This probably should have been my second clue.

Once I got my packages home, I was going to prepare the marinade for the beef.  I unwrapped the meat with the intent of trimming it.  On closer inspection, I noticed that it was really discolored.  It also had a lot of fat on it.  Now, we don’t have the best knife set in our rental kitchen, but I couldn’t even cut it.  No matter what direction in relation to the grain I used, it was too tough.  Alright, enough is enough.  I threw the whopping $3 of meat in the trash and headed out to the store again. 

This time I visited a butcher I knew who could help me figure out what to do.  We put our meatheads together and decided that the best course of action was to buy fajita meat.  Yeah, that’s right.  I bought Texas fajita meat to make Korean bulgogi.  Hear me out…fajita meat is sirloin made for marinade and thin slicing.  Plus, it isn’t too expensive.  Meat crisis over, I went home to make my marinade.

Bulgogi
For 1 lb of meat, very thinly sliced

1 cup soy sauce
1/8 cup white sugar
2 Tbsp garlic powder
¼ cup sesame oil
1 bunch spring onions, cut into 1-inch pieces
dash of rice vinegar

Place all ingredients and meat in a gallon sized ziploc bag.  


Using your hands, distribute the marinade around and over the beef.  Refrigerate for at least 30 minutes.  The meat can then be stir fried, broiled, or grilled.  You may want to chop it into bite-size pieces, as I did.


Bibim Bap
Serves 4 to 6

2 cups medium-grain Korean (or Japanese) rice
1 large cucumber, sliced into thin strips
1 1/2 cups bean sprouts
1 1/2 cups spinach, trim stems
2 carrots, julienned
1/2 lb meat, optional
Fried egg as a topping, optional
Sesame oil
Sesame seeds

For making the right rice, which is really important, here's what Virginia says to do.  Rinse the rice to get rid of excess starch.  Then put enough water in it so that when you lay your hand flat on the surface of the rice, the water goes up to your big knuckle on your fingers.  She uses a rice cooker, but if you want to do on stove, just bring it to a boil and then immediately cover, turn heat down to low, and then let that "steam" for 20 minutes.  Do not open lid during the 20 minutes.  I used 1½ cups of dry rice and 2 cups of water.  I brought it to a boil, then covered and turned down the heat to low and cooked for 20 minutes.

I cooked all vegetables separately and kept them separate until serving.

Soak the cucumber in saltwater for about 20 minutes, then drain.

Place the bean sprouts in boiling water for 2 to 3 minutes, and drain. 


Cook the spinach in boiling water for no more than 3 minutes and drain very well.  I squeezed it with my hands to remove excess water.  I seasoned each with a drizzle of sesame oil, a dash of salt, and a sprinkle of sesame seeds.


Sauté carrots in a bit of sesame oil and sprinkle with salt.


Spoon cooked rice in large bowl or platter and arrange vegetables on top.


If you like, the bulgogi and egg can be placed in the center.


This was delicious, and we ate until we were almost sick.  We attempted authenticity by eating with chopsticks, but my husband reverted to using a fork because he couldn’t shovel it into his mouth fast enough.  Thanks for the recipes, Virginia!


Wednesday, September 22, 2010

That Old Hatch Magic

For an all too brief time each year in the late summer, chile heads covet a New Mexican long green chile, known commonly as a Hatch chile.  But, you can help make the magic last throughout the year by roasting and freezing them.  Most vegetables lose texture and taste in the freezer, but Hatch chiles do really well.  And, the longer they are stored in your freezer, the hotter they get.

Choose Hatch chiles that are a glossy, bright green.  They should be firm and heavy for their size.  For easy roasting, pick out relatively straight or flat peppers because they will turn more easily and blacken evenly.

There are several methods for roasting, but for each method use tongs to turn the peppers until the skin blackens and blisters evenly.

On the grill, place chiles about 5 inches above a gas or charcoal fire.

If you have a gas stove, you can position the chiles on a stove top grill over high heat.  If you have an electric stove, use a cast-iron skillet.  Place the skillet on a burner over high heat.

You can also broil the peppers.  Position chiles on a baking pan and set under the broiler for 6 to 8 minutes, or until skin blisters.


After roasting, place chiles in a sturdy plastic bag and close.  In about 10 minutes, the steam will soften the skin so that it peels off more easily, using your hands or a knife.  Don't rinse the chiles under water because it will remove flavor.


Peeled, roasted chiles can be frozen in plastic bags.  And while I can't imagine them not being eaten sooner, frozen chiles will keep up to two years.

Tuesday, September 21, 2010

September is National Bourbon Heritage Month

Oh, it's the most wonderful time of the year...I'm just kidding.  I do enjoy any recognition of bourbon, though.  Bourbon is one of my favorite spirits, and I appreciate its impact on American history.


National Bourbon Heritage Month is the celebration of bourbon as America's Native Spirit.  On August 2, 2007, the US Senate declared September as "National Bourbon Heritage Month."  The bill, sponsored by Republican Senator Jim Bunning of Kentucky, passed by unanimous consent.  The resolution reinforced the 1964 Act of Congress that declared bourbon America's Native Spirit by celebrating the family heritage, tradition and deep-rooted legacy that the bourbon industry contributes to the United States.  At that time (1964), Congress established guidelines for the distilling of bourbon and declared that only whiskey made in the United States can be called bourbon.

I celebrated my legacy this weekend by making some popcorn balls, which were a favorite of my family when I was growing up.  These continued the tradition.


Bourbon Pecan Popcorn Balls
Makes about 3 dozen 2 1/2-inch balls

4 quarts popped popcorn
1/2 cup butter
2 cups sugar
2/3 cup light corn syrup
2/3 cup water
1/4 tsp salt
1 tsp vanilla
2 Tbsp bourbon
1/2 to 1 cup toasted pecans, chopped

Carefully remove any unpopped kernels from popcorn.  Put popcorn in a large (or 2 medium) buttered baking pan.  Keep warm in a 250 degree F oven.

Combine butter, sugar, corn syrup, water, and salt in a saucepan.


Stir over medium heat until sugar is dissolved.  Cook until mixture reaches 255 degrees F on a candy thermometer, stirring frequently.


Remove saucepan from heat.  Quickly stir in vanilla, bourbon, and pecans.

Pour mixture over popcorn, stirring to mix well.


Butter hands or lightly cover with cooking spray.  Form popcorn into balls with hands.  Watch out the mixture will still be hot!


Let cool on wax paper.  Once completely cool, wrap individual balls in plastic wrap to store and serve.


They are perfect for tailgating or Halloween parties.  Wrapped and kept in a dry place, they will stay fresh about 3 to 5 days.

Monday, September 20, 2010

I Need Your Support

So, you may have heard that I've entered a contest on the site Food Buzz called Project Food Blog.  It is an interactive contest to discover the next hot food blogger.


Following 10 challenges to whittle down nearly 2,000 contestants, the winner will receive a $10,000 cash prize and will be featured in a dedicated section of Food Buzz for a year.  Cool, huh?

I've submitted my entry for the first challenge, and voting starts today, Monday, September 20.

Here's where I need your support...I advance to the next challenge by accumulating votes from the official judges, fellow Food Buzz Featured Publishers, and you.  Please visit my entry for Project Food Blog and submit your vote of support.  (You will need to join Food Buzz.)  If you like my entry, please ask your friends and contacts to do the same.

Thanks for your continued support!  I couldn't do this without your help.

Friday, September 17, 2010

Golden Corn Salad

I'm trying to convince my husband to do something that he is not so sure he wants to do.  So, I put together this salad of some of his favorite things.  I thought about calling it Suck-up Salad, but decided on something more lyrical...

This would be a great salad to take to a tailgate party or potluck.  Another bonus - it becomes more flavorful the longer it sits, so it is a perfect dish to make in advance.


Golden Corn Salad
Serves 4

4 ears of sweet fresh corn
1 golden bell pepper
1 serrano pepper
2 green onions, chopped
1/4 cup apple cider vinegar
1/8 cup sugar
1 Tbsp Kosher salt
white pepper and salt, to taste

Shuck ears of corn and cook them in boiling water for about three minutes.


Drain well and rinse with cold water to cool.  Once they are cool enough to handle, cut off the kernels and place in a bowl.


I already had my broiler going so I tossed in the bell pepper and serrano pepper to roast them.  I think it would be good if you used them raw, too.  But, if you want to roast them, you can broil the bell pepper for 7 or 8 minutes until it starts to char and the small serrano just needs about 2 minutes.  Let them cool and peel off the skin.  Chop them finely, and add to the corn.


Add chopped green onions to the bowl and blend.


In a saucepan, stir cider, sugar, and salt.  Continue stirring over medium low heat until the sugar and salt dissolve completely.


Bring liquid to a boil.  Turn off heat, and pour over vegetable mixture.  Stir, and add salt and pepper to taste.


Keep in a sealed container in your refrigerator for 3 to 5 days.

Thursday, September 16, 2010

Care & Feeding of Cast Iron Cookware

No Texas kitchen is complete without at least one cast-iron skillet.  I have two.  One is a 10-incher that I bought new in Marshall, Texas at Marshall Pottery when I first set up my own kitchen.  The other is a 13-inch monster that I inherited from my Aunt Mary Lee.   It is hard for me to lift with one-hand, and I'm a strong girl.  Here in my rental kitchen, I've enjoyed another large skillet and a really nice Dutch oven.  It makes me want to cook like a cowboy.

I use cast-iron for all kinds of things and I'm not sure how I would make some of our favorite dishes without those skillets.  I've realized that not everyone shares my preference for cast iron, though.  I suspect it has much to do with the seasoning process.  See, cast-iron is a porous surface, and it needs to be seasoned to fill in and smooth that surface.  Otherwise everything you try and cook will burn and/or stick to the pan.

Here's how to season cast-iron cookware:

Wash, rinse, and dry the piece.  Some folks say never use soap on cast-iron.  It is okay to use soap as long as you are re-seasoning after.  Make sure it is rinsed thoroughly and dried completely.  If you have a piece that is rusty and it doesn't come off with soap and water, you can scour it off with steel wool or a scrubby sponge.


Use a solid vegetable shortening (I use Crisco) to grease the inside surface.  Use the same amount as you would to grease a baking dish for a cake.


Place the greased pan in your oven and turn the heat up to 350 degrees F.   Let it bake in the oven for about an hour.  Then, turn off the oven and you can let the cast-iron cookware cool in the oven.


If you've bought or inherited cookware that is in really bad shape, you may need to repeat this process before you use it.  Also, until your cookware is well seasoned, you should avoid cooking highly acidic foods, like tomatoes, because they can be corrosive to the cast iron.


Tips for cleaning cast-iron cookware:

After cooking something with little to no residue, like tortillas, I just wipe my skillet clear with a damp towel or sponge, and dry it promptly with another towel.  For messier dishes, I rinse the pan in very hot water and use a sponge or sometimes a nylon brush to clear it of food bits.  If things are really stuck, I boil some water in it on the stove top until it loosens.  Finally, I do sometimes use soap, never a harsh cleanser, because I'm concerned the spices used in a dish were absorbed my the skillet and could flavor the next item I cook.  I only do this when I am prepared to re-season the skillet.  Never wash your cast-iron in a dishwasher.

It is important to dry cast-iron cookware very well after each use, or it could rust.  Do not let it air dry.  After rinsing my skillet, I usually just put it back on the stovetop and turn the heat on low or medium low for a few minutes until it is dry.

With use the cast-iron cookware will darken from a steel grey color to dark grey or black.

I recommend everyone give cast-iron a try in their kitchen.  You can buy them new or pick them up for pretty cheap at a thrift store or yard sale from someone who doesn't know the treasure they have.  Even if you buy a piece pre-seasoned, these tips can help you keep your cookware in top shape.

Search Amazon.com for lodge cast iron

Wednesday, September 15, 2010

Blueberry Sour Cream Coffee Cake

Now that we have a working oven again, I'm back to my usual baking antics.  This was inspired by a pint of fresh blueberries and a partial container of light sour cream in our refrigerator.  I turned it into a coffee cake because I don't have any muffin tins in my rented kitchen.

Blueberry Sour Cream Coffee Cake

Cake:
1/2 cup butter
1 cup white sugar
1 egg
1/2 cup sour cream (I used light)
1 tsp vanilla
1/2 tsp baking powder
pinch of salt
3/4 cup all-purpose flour
1 cup fresh or frozen (not thawed) blueberries

Topping:
1/3 cup brown sugar
1/2 cup chopped pecans
1/2 tsp ground cinnamon

Cream butter and sugar.


Add egg.


Stir in sour cream and vanilla.  Gradually stir in dry ingredients of baking powder, salt, and flour.


Gently fold in blueberries.  Poured into a greased and floured baking dish.  I used a 9x9 square dish.  The batter will be thick.


Blend together brown sugar, pecans, and cinnamon.


Sprinkle the mixture over the batter in the baking dish.


Bake for about 50 minutes or until lightly golden brown.  This is great warm out of the oven or at room temperature.

Tuesday, September 14, 2010

Food as History or Project Food Blog Challenge #1

All of us have to eat.  I, for one, really enjoy eating – it not only makes me feel good, but it is a profoundly social experience for me.  I gain so much pleasure out of cooking for others and I feel food is always an occasion for sharing.


This feeling is also why I have created a food blog.  I like the sense of connection, the bond I make with my readers.  I can’t necessarily feed your stomach, but I can offer you something that I hope is filling none the less.  And, perhaps we can share an experience when you recreate something like it in your kitchen.


Readers of my earlier posts will recall that my husband and I are living temporarily in Fort Worth, Texas, not far from the community where I grew up.  I have moved around a lot in my life, and I’ve been feeling the need to settle down in one place soon.  It has been a comfort to be back in Texas, but I know our current living situation is only temporary.  I like the idea of long-time connections and a sense of history and ownership with a place. I’ve realized that I’ve been creating those connections and building a history even while I move from place to place.

Food carries my history and creates my sense of place.  I share myself and my history when I cook for others.  The food described in this blog explains who I am and where I am from.  But, I don’t focus solely on my plate.  I put my recipes and menus in the context of my life.  I want my readers to understand what influences my cooking, what leads to my ingredient choices, and why I do what I do. 


I hope this blog inspires others to cook, and to feel relaxed and creative in the kitchen.  I like the quote from Herman Melville – “We cannot live for ourselves alone.  Our lives are connected by a thousand visible threads, and along these sympathetic fibers, our actions run as causes and return to us as results.”  I believe it well describes blogging, but it also fits how I want to think of my life.

This weekend, I felt the joy of these invisible threads, these sympathetic fibers.  My husband and I invited friends over to watch football and be fed.  We spent time with people who have been woven into our lives from years ago and only recently.  They’ve all had an impact on my life and an impact on what comes out of my kitchen. 

In deciding what to feed them, I turned to a football watching favorite shared with me by another old friend, Patrick.  He always made chicken mole when friends came over to watch the Dallas Cowboys, and I felt it had been too long since I had some.  He taught me a recipe shortcut and I’ll share it with you.

Short-cut Chicken Mole
Serves 6 to 8

about 3 lbs chicken (I used a mix of boneless chicken breasts and thighs)
1 to 2 Tbsp canola oil
2/3 cup chopped white onion
2 cloves garlic, minced
8 oz jar of mole sauce (I prefer Dona Maria)
1/4 cup creamy peanut butter
32 oz water, chicken broth, or beer, or combination of any
3 chipotle peppers in adobo sauce (diced) - optional
rice for serving - optional
tortillas for serving - optional

Heat canola oil in heavy-bottomed pan and add chicken pieces.  Give them a nice brown sear, they don't need to be cooked through.  Remove the chicken from the pan and set aside.


Add more canola oil, if needed, and put onion into pan to soften and brown a bit.  Add garlic and stir.  


Pour in jar of mole sauce.  Yes, I know...a jar of  mole sauce.  I'm not normally an advocate for jarred sauces, but we can doctor it up and you will appreciate the short-cut.  


The spice sauce is very thick and dense, and can be very strong tasting.  I add peanut butter to smooth the edges and add a bit of depth.


Now pour in the liquid so that the sauce will thin.  I used just beer this weekend, but you can use any combination of water, chicken broth, or beer.  Stir.


I add chipotle peppers with adobo sauce to add a bit more heat to the sauce.  You can adjust the amount of peppers, skip them entirely, or add a different kind of spice, if you prefer.  Keep stirring until the mole sauce is smooth.


Add browned chicken pieces.  Then just let the sauce simmer and break down the chicken so it is meltingly tender.  This makes it a great dish for casual parties.  You can let it keep simmering on low heat for a while as folks help themselves at different times.  This weekend, I let it simmer for almost 3 hours before we dug in the first round.  It also reheats well.


You can serve the mole sauce over rice, as I prefer, or use tortillas to make mole tacos, like my husband.