Wednesday, November 24, 2010

A Tale of Two Side Dishes

I didn't see a can of jellied cranberry sauce on the Thanksgiving table until I was an adult.  I must admit I thought it was a bit of a joke.  However, I have come to realize that it is a comfort food to some people and a strong part of their holiday tradition.  My husband is one of those people.  He firmly believes that not only must our meal include a can of jellied cranberry sauce, but it we should not destroy the ridges formed by the can for the sake of presentation.

Last year, our first Thanksgiving as a married couple, he performed a small ritual to open the can.  Apparently, you must ease the jelled sauce out of the can oh-so-slowly, so it can maintain its nature defying shape, including the ridges of the inside of the can.  There was also discussion about the noise that the sauce makes as it makes its complete descent from the can.  I'm not even sure how to spell the sound I heard...How could I deny him this pleasure?

So, the jellied cranberry sauce will once again be making an appearance this Thanksgiving.  But, because I don't like it, we will also have a cranberry relish.  Yes, I could make a homemade cranberry sauce... 1 bag cranberries, 1 cup sugar, 1 cup water...cook until saucy.  But, I grew up with a relish on the table.  A cranberry orange relish to be exact.  Dad made it every year.   After several years of cranberry experimentation as I hosted by own Thanksgivings, I have decided to revisit an old stand-by...with an addition (apple) to make it my own.

Cran-Orange-Apple Relish

1 orange (I used navel)
1/2 apple (I used Pink Lady)
12 oz bag fresh cranberries
1/4 to 1/2 cup sugar, depending on taste

Cut and peel the orange, and remove the segments from their membranes.  I just used my hands to peel it apart in large chunks and dropped it in a food processor.  Add most of the zest from the orange.


Peel, seed, and chop the apple.  I just used half, but the whole apple will work, too.  Add it to the food processor.


Sprinkle on about 1/4 cup sugar, and pulse it with the fruit.  Give it a taste to see if it needs more sugar.  Even if you think you like things sweet, it is better to start with less sugar and add as you go.  You can't take it away once it is in there.  Plus, if you use a sweeter apple, like Pink Lady, you will likely need less added sweetener.  


Luckily, cranberries are highly acidic.  Why is that lucky?  Well, those acids discourage the growth of bacteria and that means that your relish will keep for quite a while in the fridge.  And, that means you can make this easy relish in advance before you feel overwhelmed by other holiday tasks.


Happy Thanksgiving!  Gobble...gobble!

Tuesday, November 23, 2010

Breakfast with Marie

I am sad to say that I never knew my mother's parents.  Fortunately, her father's sisters worked very hard to make up for that loss, making sure we knew a lot about our grandparents and their history.  They always made our visits special, and that included as many delicious treats as my brother and I could eat.

As a kid, I wasn't a big fan of breakfast.  I wasn't willing to sit down and eat just anything in the morning.  I did, however, love the apple bread my great-aunt Marie made for me.  In fact, that was pretty much the only thing I would eat for breakfast during my visits.  Well, there was the Apple Jacks cereal phase, but that's another story.

Aunt Marie worked hard to make us happy and always feed us what we wanted to eat, and there was always a loaf of apple bread waiting for me when I awoke.  I'd sit at the huge kitchen table and watch the boats in the bay and talk about life and what I wanted to do with my day.  Our aunts were both generous listeners who could make my brother and I feel like we were the only thing that mattered.  We all know we are very lucky to have them a part of our lives, and we still miss them.

I made a loaf recently and shared some with my mom.  The smell and taste of Aunt Marie's apple bread brought back a lot of great memories for both of us.  I know Aunt Marie would be proud.

Aunt Marie's Apple Bread
Makes 2 medium-sized loaves (or 1 large and 1 small)

1 cup butter
1 1/2 cups sugar
4 eggs, beaten
4 cups flour
1 tsp salt
1 tsp cinnamon
2 tsp baking soda
4 Tbsp buttermilk
2 tsp vanilla extract
4 cups peeled and diced apples

Topping:
4 Tbsp butter
4 Tbsp sugar
4 Tbsp flour
2 tsp cinnamon
1 tsp ground cloves

Cream butter and sugar until light and fluffy.  Add eggs, mixing well.


Stir in flour, salt, and cinnamon.  


Dissolve baking soda in buttermilk and add to batter, mixing well.  Stir in vanilla and apples.


Spoon batter into well-greased and floured loaf pans.  

To create topping, mix together all ingredients until consistency of coarse crumbs.


Sprinkle the batter in pans with topping and bake at 325 degrees F for about 70 minutes.


This bread freezes beautifully, making it a perfect treat for the holidays.  You can keep some on hand in your freezer for unexpected guests or to give as gifts.  It doesn't keep past about 2 days at room temperature, so definitely put it away in the freezer, if you don't eat it before then.

Monday, November 22, 2010

Don't Be Squashed By A Recipe Risotto

If you have not yet made your own risotto, you should give it a try sometime soon.  An Italian rice dish, risotto is typically served as a first course, but it can be modified to serve as main course or side dish.  Plus, it works year-round as you can vary the flavor using in-season vegetables, meats, spices, and cooking liquids.


And, while I am going to give you one, you don't need a recipe to make risotto.  You just need to understand the basic preparation of the dish, and add the ingredients you prefer.


First, start with the type of rice.  You want a medium- or short-grain rice.  They are better able to absorb liquids and release starch and become sticky.  The rice is sautéed for a short time in a soffritto (onion and/or garlic with olive oil and/or butter) to coat the grains in fat.  Wine and or beer is then added to be absorbed by the grains.  Turn up the heat  under the rice and gradually add small amounts of hot stock while almost constantly stirring.  It usually takes me 20 to 30 minutes of adding liquid and stirring; adding and stirring.  The stirring loosens the starch molecules from the outside of the rice grains into the cooking liquid to create a creamy textured dish.  During the last few minutes of cooking, you can add vegetables or meat (typically cooked) and stir.  Then, once you take off the heat, make it even more creamy by adding a bit of butter and grated cheese.


Butternut Squash Risotto
Serves 4 to 6

2 lbs butternut squash, peeled, seeded, and cut into 1-inch chunks
4 Tbsp olive oil, divided
salt and pepper, to taste
4 cups chicken broth
1 cup water
1/3 cup onion, chopped
2 cloves of garlic, minced
2 cups Arborio rice
1 cup beer (I used lager)
1/4 tsp grated nutmeg
1/2 tsp ancho chili powder
2 Tbsp butter
1 cup grated Parmesan cheese

Spread chunks of butternut squash on a baking sheet.  Drizzle with 2 Tbsp of olive oil, and add salt and pepper to taste.  Roast in 450 degree F oven for about 25 minutes.  This is an easy step to do ahead of time.


In medium saucepan, bring chicken broth and water to boil.  Leave on simmer.

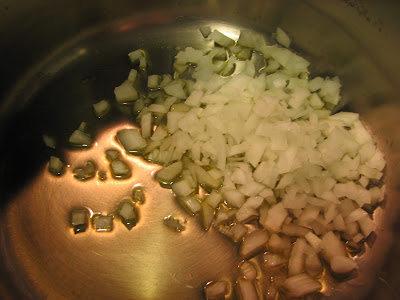
In another medium pan, heat remaining 2 Tbsp of olive oil.  Add onion and garlic, and saute for 2 or 3 minutes until starting to soften.  Add rice to pan and toast for another 2 to 3 minutes.  


Add beer and cook it out completely, stirring occasionally.  This took me about 3 minutes.  Then, while continually stirring, add hot broth and water mixture to the rice 1/2 cup at a time.  Allow the liquids to be absorbed each time before adding another 1/2 cup.  Continue until no liquid remains.


When the final 1/2 cup of liquid has been added and is almost absorbed, stir in cooked butternut squash chunks.  Stir in nutmeg, salt, and pepper to taste.  Add butter and stir in as it melts.  Turn off heat and stir in grated Parmesan cheese.


Spoon into bowls and serve immediately.

Thursday, November 18, 2010

Filling Up on Texas

As our time in Fort Worth came to a close, we spent a lot of time filling up on our favorite Texas foods.  This included plenty of Gulf Coast shrimp...

Spicy Shrimp Tacos with Avocado Salsa
Serves 2 to 4

For tacos:
1 to 1 1/2 pounds of shrimp, peeled and tails removed
2 tsp chili powder
1 tsp cumin
1 tsp cayenne
2 cloves garlic, minced
1/3 cup olive oil
corn tortillas
shredded cabbage, optional
coarsely chopped cilantro, optional

Put peeled shrimp into a gallon-sized zip-top plastic bag.  Sprinkle with spices.  Add minced garlic.  Pour olive oil into bag.  Using hands distribute spice mixture over shrimp until well-covered.  Let marinate for about 30 minutes.


Grill over medium high heat for 2 to 3 minutes on each side, or until shrimp are translucent.

You can grill the tortillas, too, until lightly charred but still pliable.  Or, you can heat them on a skillet on the stovetop or in the microwave.


For salsa:
1 small onion
1 jalapeno
1 clove garlic
4 small to medium tomatillos, husked and rinsed
2 small avocados, peeled and seeded
1 tsp Kosher salt
1 Tbsp lime zest
juice of 1 lime


Finely dice onion, jalapeno, and garlic.


You can use a food processor, if you have one.  Pour into a bowl.

Coarsely chop tomatillos.


Sprinkle with salt and lime zest.  Add lime juice and stir.


Cut avocados into chunks.  Add to bowl.


Serve with shrimp on tacos...