Tuesday, December 28, 2010

Book Review: Four Fish by Paul Greenberg


Before the holidays I finished an interesting book by frequent New York Times Magazine contributor, Paul Greenberg, entitled Four Fish: The Future of the Last Wild Food.  Greenberg is a lifelong fisherman and he clearly struggles with the contradiction of saving fish and their environment, but writing with passion about the thrill of hunting them.

The book is divided into chapters on salmon, sea bass, cod, and tuna – the four fish most prized by consumers and therefore facing drastic reductions to their wild stock.  Each section describes basically the same cycle.  There were times of abundance, when fish found plenty of prey and nutrients and could freely follow their patterns of migration.  As Greenberg put it wild fish seemed to be “a crop, harvested from the sea, that magically grew itself back every year.  A crop that never required planting.”  Then came pollution and changes in water temperatures, along with blockages to spawning routes, and of course, overfishing.  He writes of the drastic decrease of wild populations, the depredations of industrial fishing, and the uncertain efforts to slow the decline by setting catch limits and closing some historic fishing grounds.

Greenberg also examines fish farming, which accounts for most of the salmon and sea bass now sold.  He details their unsuccessful efforts to deal with the problems of pollution, genetic contamination that threaten wild stocks, and the question of flavor differences. 

He acknowledges that mounting food demand is inevitable.  In fact, the world’s per capita consumption of fish has increased from 20 pounds in the 1960s to 36 pounds in recent years.  The oceans cannot keep up with our demands.  He reluctantly concedes that the solution is fish farming, because otherwise, the pressure on wild stocks will be uncontainable.  However, he argues that farming should shift from the four premium fish where it squeezes the wild population, to other species.  One example Greenberg provided is tilapia.  These fish breed in fresh water, multiply rapidly, and live on a vegetarian diet, thereby reducing the need for the industrial harvesting of the tiny marine life that salmon, cod, bass, and tuna require.

Greenberg also addressed an issue of concern to many contentious eaters.  Which fish can we eat without guilt?    Unfortunately, this is a question not easily answered by looking at Monterey Bay Aquarium’s seafood-watch card.  In truth, he shows, there is rarely such a thing as a good wild fish for any of us to eat, at least not if all of us eat it.

Greenberg lays out the grim realities, but he still manages to sound hopeful about the future of fish, and I feel as though I almost met some of the innovators Greenberg describes who are attempting to deal with the scarcities.

But. for all his defense of innovation and farming, Greenberg without a doubt sides with wild fish.  In the case of tuna he calls for the kind of ban that has been applied to whales.  “The passion to save the bluefin is as strong as the one to kill them, and these dual passions are often contained within the body of a single fisherman.”

He describes the tension between seeing fish as wildlife versus food.  “Wild fish did not come into this world just to be our food,” he argues.  “They came into this world to pursue their own individual destinies.  If we hunt them and eat them, we must hunt them with care and eat them with the fullness of our appreciation.  We must come to understand that eating the last wild food is, above all, a privilege.”

Four Fish is a marvelous exploration of that contradiction, and it is a necessary book for anyone truly interested in what we take from the sea to eat.

Monday, December 27, 2010

Memories of Anise Seed

My husband and I both have memories of anise seed cookies at the holidays and throughout winter, but I had never baked them myself.  I must admit that I didn't like the flavor of anise as a kid, but now I think it is a nice change of pace.  I found a recipe from my great-aunt, but it seemed to be missing a few steps and it required wooden cookie molds which I do not have.  I decided to try a recipe from Maida Heatter instead.  Plus, it gave me a reason to use my new mortar and pestle!

Anise seed is a spice with a licorice flavor.  You should be able to find it in the baking aisle of your grocery store.  The seeds are oval shaped and gray-brown in color.  It is a very aromatic spice and will make your kitchen smell lovely.  I really like these cookies with coffee.

Anise Seed Cookies
Makes about 45 cookies
Modified from Maida Heatter's New Book of Great Desserts

1/2 cup blanched whole almonds
1 tsp anise seeds (not ground)
1/2 cup butter
1 tsp vanilla extract
1 1/2 cups white sugar
1/4 tsp salt
3 eggs
3 cups all-purpose flour
1 egg white
sprinkle of granulated sugar for cookie tops

If your almonds aren't already blanched, it is easy to do yourself.  Just put the whole almonds in boiling water for no more than a minute, drain well, and rinse with cold water.


Once they are cool enough to handle you can easily slip off the skins.  Pat dry.


Put the skinned almonds on a rimmed cookie sheet and put them in a preheated 250 degree oven.  Shake or stir occasionally until the nuts are slightly colored.


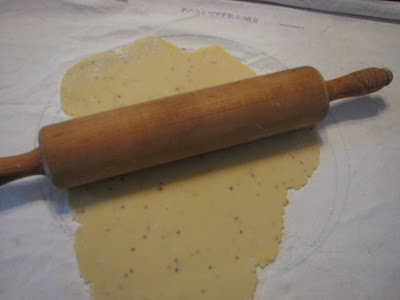
Crush the anise seeds in a mortar and pestle.  They do not have to be finely ground or strained.  Set aside.


Beat the butter until soft and smooth.  


Add the vanilla and sugar and then beat until well mixed.


Add the eggs, one at a time, beating after each addition until incorporated.


Add the anise seeds, and on low speed, gradually add the flour, scraping the bowl and beating only until mixed.


The dough will be quite soft and sticky.  Transfer to plastic wrap and chill in the refrigerator for at least half an hour or until it is firm enough to be rolled.  Resting the cookie dough in the refrigerator evens out the moisture level, relaxes gluten, and firms the fat, which produces neater edges to your cookies.

Adjust the racks of the oven to split the oven into thirds and preheat the oven to 350 degrees F.  Line two cookie sheets with foil.


Work with half the dough at a time, leaving the rest in the refrigerator.  On a floured surface and with a floured rolling pin, roll out the dough until about 1/2-inch thick.


Using a round cookie cutter or biscuit cutter, cut rounds of dough and place them about an inch apart on the cookie sheets.

Press the scraps of dough together, rechill, and re-roll.


There should be enough almonds to place one on each cookie, or if you want to leave some without nuts (as I did for my mother-in-law), you can use more than one almond on a cookie.


Beat the egg white until foamy.  With a pastry brush, brush the egg white over the tops of the cookies.  Sprinkle generously with sugar.


Bake for 20 to 22 minutes, switching the place of the cookie sheets to ensure even browning.  The cookies will be slightly colored and will feel semi-firm to the touch.  Try not to overbake or they will get too hard.


Transfer the cookies to a wire rack to cool.  They can be frozen, but they keep very well in an airtight container for several days.


Tuesday, December 14, 2010

Red Velvet for the Holidays

My friend, Kate, (also known as my brother's girlfriend) asked me to make something she could bring to her work holiday party.  At first she wasn't sure what she wanted, and I think initially I overwhelmed her with possible options.  After reviewing the other submissions, we decided a cake would be the best bet, and I thought a red velvet cake with white frosting would look especially festive.  Add some mint flavoring and top it with crushed peppermint and then it is holiday party-ready...

What are your favorite holiday party treats?


Minty Red Velvet Cake with Best Ever White Frosting
Makes 8-inch two-layer cake
Modified from Pastry Queen Christmas

1/4 cup red food coloring
4 Tbsp cocoa
1 cup butter at room temperature
1 3/4 cups sugar
2 large eggs
2 cups cake flour
1 1/2 cups all-purpose flour
1 tsp kosher salt
1 tsp baking soda
2 tsp vanilla extract
1 tsp peppermint extract
1 cup buttermilk
1 cup sour cream
1 Tbsp distilled white vinegar

Preheat the oven to 350 degrees F.  Grease and flour two 8-inch round pans.

In a small bowl, blend red food coloring and cocoa into a creamy paste.  Set aside.


Using an electric mixer with the paddle attachment, cream butter and sugar until light and fluffy.


Add the eggs, one at a time, beating after each addition.


Then, add cocoa paste, and beat again at medium for about 4 minutes.


In a medium bowl, sift together flours, salt, and baking soda.


Pour buttermilk into your measuring cup and add extracts.


Starting and ending with flour, alternate between flour mixture and milk, add to the creamed butter and sugar.  Beat on medium speed after each addition only until ingredients are combined.

Next, add sour cream and vinegar and beat on low speed until combined.


Divide batter between greased and floured cake pans.  Bake for 35 to 45 minutes, or until cakes feel firm to the touch and a tester comes out clean.  Be careful not to overbake or the cakes will be dry.


Remove from oven and let cool for 5 to 10 minutes in the pans, then turn out onto wire rack to finish cooling.


Let cool completely before frosting.


Best Ever White Frosting

3 egg whites
3/4 cup white sugar
3/4 cup light corn syrup
1 Tbsp water
1 tsp vanilla

Put all ingredients in a double boiler.  Start beating the ingredients with your electric beater at the same time you turn on the burner.


Beat until the frosting stands in stiff, glossy peaks.  This varies in time, as some eggs whip faster than others.


The frosting will come out shiny and fluffy with a consistency like marshmallow.  Spread on the cake with an offset spatula.


Happy Holidays!

Friday, December 10, 2010

Gift Ideas for Your Favorite Cook

It cannot already be December 10.  Can it?  I'm usually in full holiday mode by this time.  This year I seem to be having trouble jump-starting the Christmas spirit.  I started my holiday baking yesterday, and that helped a bit, but I still have several things I want to do before Christmas yet no matching motivation.  Perhaps thinking of presents for others will get me going...


Looking for some great gift ideas for the cook in your life?  Well, look no more.  I've compiled a list of useful and fun items for cooking, eating, and drinking.  I promise this is not a list of frivolous gadgets or trendy cookbooks to clutter their kitchen.


Microplane Stainless Steel Zester

Microplane Zester - I have had mine for years and am continually surprised by how often my husband and I pull it out of the drawer to use.  Any one who cooks regularly will be thrilled to have this in their stocking.  Use it to zest citrus and grate hard cheeses or spices.


Rosle 8.6-Inch Flat Whisk

Flat Whisk - I find that in my kitchen the flat whisk is much more useful than the more common balloon whisk.  The balloon whisk is best to whip egg whites or cream, but I have electric mixers for those tasks.  The flat whisk is great for sauces, vinaigrettes, or scrambling eggs.  Plus, the flat whisk fits more easily into my counter storage system,  and it is easier to clean.  (I do not have a dishwasher.  Gasp.)


Polder 510 Glass Candy/Deep Fry ThermometerCandy Thermometer - Yet another goodie for your loved one's stocking...This handy tool is used to take the temperature and therefore determine the cooking stage of sugar and is also helpful to measure hot oil when frying.  I use it frequently for making candy and preserves.  I find the traditional liquid thermometer is easiest to use and I appreciate having a clip to attach to the pot or saucepan so I may have my hands free for stirring or      adding additional ingredients.   Make your gift more special by giving this with a handwritten recipe.

Lodge Logic L5SK3 Pre-Seasoned Cast-Iron 8-Inch Skillet
Cast Iron Skillet - If you do not yet have a cast iron skillet, what is holding you back?  Right.  I know, your glass or ceramic cooktop.  Well, for those of you without the fragile cooktop, you want one of these.  I have talked about them before, and I even told you how to take care of it.  


Oneida Polished Black Mandolin Interchangable SlicerMandoline Slicer - This tool is not only useful, but also kinda fun.  It is great for slicing and cutting all kinds of vegetables to a uniform thickness which not only makes your dishes more attractive, but ensures equal cooking time for both frying and baking.  This one has several attachments so you can create different types of cuts, and it has a carrier to help you not slice off your fingertips.  A plus!


Silpat Baking Sheet - 11.63x16.5"Silicone Baking Mat - No more need for parchment paper with this non-stick baking mat.  It is really useful for sticky batters or toffee.  Get them more than one.


Keys to Good Cooking: A Guide to Making the Best of Foods and Recipes

Keys to Good Cooking by Harold McGee - This book can serve as a useful companion to any cookbook, and can be a resource to a kitchen novice or experienced chef.  Learn the science of what is happening in your cooking and improve what you turn out.


KitchenAid K45SS Classic 250-Watt 4-1/2-Quart Stand Mixer, White

Kitchen Aid Stand Mixer - Don't wait until you get married...get one now.  I have the classic version and I love it.  I don't really need to tell you why you or your favorite cook want one.


Okay, here are a couple of gifts that are a little less practical and a bit more fun...

Fred and Friends Gin and Titonic Ice Cube Tray


Gin and Titonic Ice Cube Tray - I got this for my birthday and they still make me smile.  Perfect for any drink, but I certainly enjoy them in my gin and tonic.


Everything Tastes Better with Dog Hair Apron


Fun Apron - Help your favorite cook protect their clothes and make a fashion statement in the kitchen.  I like this one because it helps support the ASPCA.


Happy Holidays, and have a great weekend!

Thursday, December 9, 2010

Potatoes Anna

Potatoes Anna or Pommes Anna is a classic French dish.  Simply, it is a mound of sliced potatoes baked in butter.  Yum.  It is one of my brother's favorites and he regularly requests it.  He and his girlfriend, Kate came over this weekend for dinner.  He made the pork ribs and I made the sides, including these potatoes.  Big thanks to Kate for assisting me in the kitchen.

Potatoes Anna
Serves 6 to 8

3 lbs baking potatoes
5 Tbsps butter, divided
kosher salt, to taste

Preheat oven to 450 degrees F.

You can decide whether to peel the potatoes or not.  We elected not to this time.  Slice the potatoes evenly to about 1/8-inch.


Melt 2 1/2 Tbsp butter in a 10-inch cast-iron skillet (or other ovenproof skillet) over medium heat.  The heavy skillet is important because it conducts heat well and will produce a crisp, browned crust.  Melt the remaining 2 1/2 Tbsp of butter in another container.  Set aside because you are going to drizzle it over the potatoes.


Arrange a single layer of potatoes, slightly overlapping, in a circular pattern in the pan, sprinkle with a bit of salt.  Drizzle with 1/2 Tbsp of butter.  Repeat the layers about 5 times, ending with butter.  They may be slightly mounded in the center.


Press down firmly with your hands to pack the potatoes.  You want the potatoes to be dense and compact so that they hold together.

Cover the pan with foil and bake for 20 minutes.  Remove the foil and bake for an additional 25 minutes or until potatoes are golden.


Take a spatula or rounded edge knife and loosen the edges of the potatoes from the sides of the pan.  Place a pan upside down on the top of the pan, invert potatoes onto plate.

Slice into wedges for serving.


Wednesday, December 8, 2010

Clear Out the Cranberries

I've talked about Thanksgiving leftovers for several posts, and I was quite pleased with myself for so efficiently using all the bits that remained from our feast.  One dish was a bit of a challenge to reinvent, however - the cran-orange-apple relish.  I can only eat it for so long before my palate tires of the tartness.

I knew there had to be a way to turn it into a baked good, but I wasn't sure how the consistency of the relish would effect the consistency of the batter.  Would I be able to figure out the ratios of dry ingredients to wet?  So, I turned to my cookbooks and the interweb for help.

Inspired by a recipe on the Washington Post's website and a spiral bound cookbook I inherited from my grandmother, I came up with this...

Cranberry Relish Muffins with Orange Glaze
Makes 12 to 14 muffins

1 1/4 cup leftover relish
3/4 cup sugar
1/2 cup vegetable oil
1 tsp vanilla extract
2 large eggs
2 cups flour
1 tsp baking soda
1/2 tsp baking powder
1/4 tsp salt
1/2 cup roughly chopped pecans

For glaze:
1/8 cup orange juice
3/4 cup powdered sugar
1 tsp orange zest

Preheat oven to 350 degrees F.  Spray a 12-cup muffin tin, or 6 cup large muffin tin with nonstick cooking spray.

To make muffins, combine the relish, sugar, oil, vanilla extract, and eggs in a large bowl.  Stir to combine.


Combine flour, baking soda, baking powder, and salt in medium bowl, then stir into relish mixture.


Add the chopped pecans and mix.


Fill muffin tin and bake on middle rack of oven for 25 to 30 minutes until tester comes out clean.


Let cool for about 10 minutes in tin, and then using a butter knife, loosen from the pan and finish cooling on a wire rack.

To make the glaze, combine orange juice, powdered sugar, and zest in a small bowl.  Smooth out any lumps and drizzle/spread on top of each muffin.


Serve warm or at room temperature.