Showing posts with label how to. Show all posts

Tuesday, May 25, 2010

Strawberry Fields Forever

If you've been reading this blog for a while, you know that I've been anxiously awaiting the start of the warm weather growing season.   Fruit just tastes so much better when you pick it yourself or at least buy it from the farmer who recently picked it.

I made my first farm trip of the year this weekend when I picked strawberries with my friends Andrea and Christina.  We visited Homestead Farms in Poolesville, Maryland and I had a great time.


It has become a bit of tradition for us, and we have made the trip several times over recent years.  The farm is not far out of Washington, DC in Montgomery County, and has a variety of produce throughout the spring, summer, and fall.   We have a nice visit in the car, and then share ideas of how to use the fresh fruit.

It has become a pretty popular place with families, especially with an expanded petting area with goats and a calf, and a hayride to the picking fields.


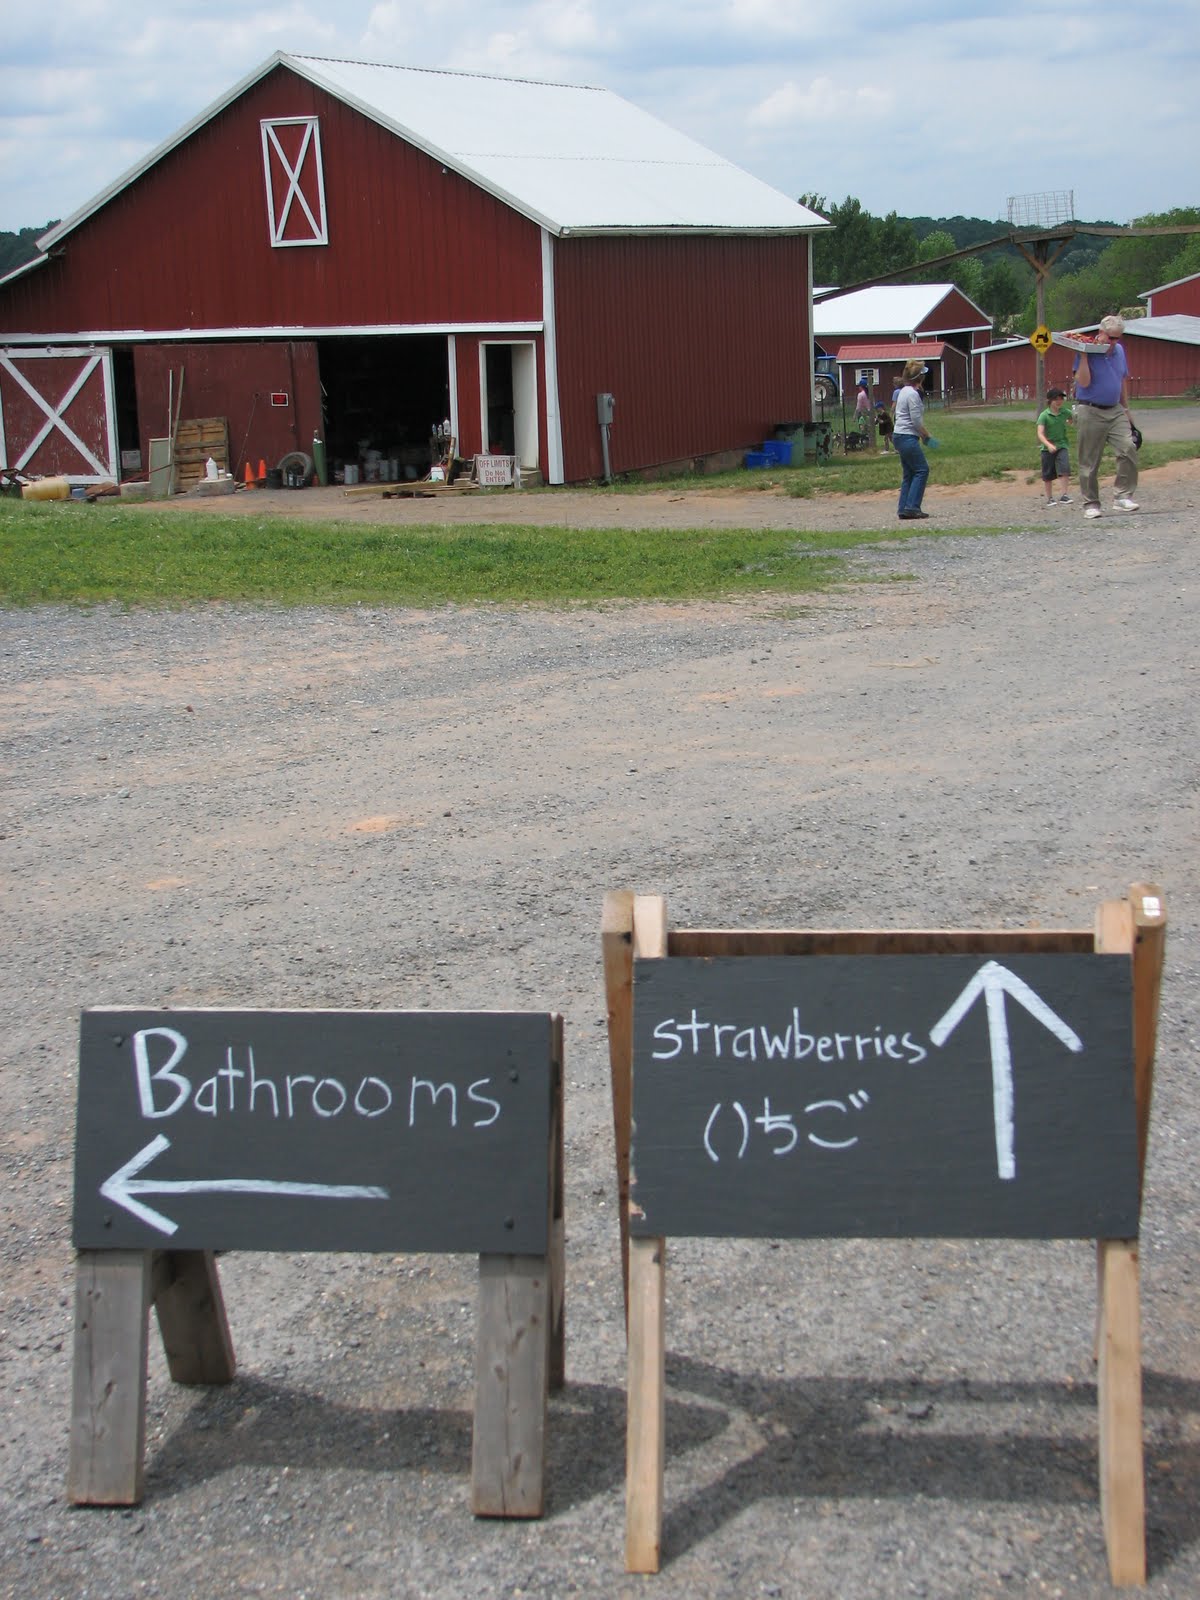
Each season, we hear more languages spoken as immigrant families bring their kids to the farm, too.  This year we realized the farm is responding to this expanded clientele and we noticed a sign in what we think is Korean.  Neat,  huh?


The farm has a store to sell other kinds of produce and a kitchen that makes goodies with the fresh fruit.  Our favorite is the strawberry smoothie.  It wasn't quite as good this year.  I fear they may be responding to their clientele in another way by making the smoothie lighter in calories instead of rich in cream that coats your tongue with a slickness as you gulp down chunks of strawberries.  Sigh.  Don't worry I still drank it all, though.


I went a bit crazy this year in my picking....I came home with over 10 pounds of strawberries.


It was a gorgeous day and the berries were plentiful, so it was easy to get carried away.  The smell of freshly picked strawberries is just heavenly, and it made the car ride home even more cheery.


I have big plans for them, so I'm not worried about using them all.  In fact, you should expect to read multiple entries about strawberries in the coming days.  I hope Andrea will share her recipe for strawberry bread so I can try it out.

Our first treat, though, was strawberry cream popsicles.  I thought they would make a nice dessert after our heavy meal of beef brisket.  Plus, we could use the new popsicle molds my husband and I got from my parents for Christmas.  It was my first time to make popsicles from fresh fruit, and I imagine I will continue to tinker with the recipe, but here is what I did this time.

Homemade Strawberry Cream Popsicles
Made 6 popsicles, using Tovolo brand molds

2 1/2 cups of stemmed and chopped fresh strawberries
1/3 cup sugar
1/2 cup milk
1/2 cup plain yogurt


Mix all ingredients in a blender or food processor until fruit is pureed and all is well blended.  A blender is best, but I had to use our food processor since our neighbor borrowed our blender late one night for some boozy margarita fun.  The processor will work in a pinch.  Pour the blended mixture into molds, insert sticks, and place in freezer until firm.  You should allow at least 8 hours.

This is really easy, so I encourage you to experiment with the process and different fruits.  You can adjust the sugar to your taste and use all milk, instead of a combination with yogurt to equally delicious results.

A note on the lack of preciseness: I don't have a kitchen scale yet, so I couldn't weigh the strawberries.  Because of that, this recipe is not exact.  I mean, we each cut our strawberries slightly differently and they contain different amounts of liquid so just consider this a rough proportion.


In case you were wondering, here are the popsicle molds we used...


Monday, May 24, 2010

Suitcase Meat

On our trip to Texas in April, my husband and I decided to bring back some of the foodstuffs that we can't get here in DC.  The most important item for us was barbeque beef brisket.  Not only can we not get large beef briskets at good prices, but we also don't have a smoker.  We had a craving as we had not had good barbeque since our wedding in October, and our friends were clamoring for us to bring some barbeque back.

So, on the first day of our trip, we purchased a 12 pound beef brisket at HEB.  My dad seasoned it and smoked it for several hours over mesquite wood.


Then, we wrapped the cooked brisket carefully and placed it in the freezer it for the remainder of our trip.  The next step was insuring safe passage and TSA allowance.  After several hours of research and a call to the airline, we decided that we would wrap the brisket in plastic, pad it with styrofoam, and pack it in a hard-sided suitcase.  With a trip to Goodwill, we scored a large American Tourister suitcase for 9 bucks.

We made sure it was frozen solid before packing and well insulated and padded for travel.  I was a nervous wreck for the entire trip home.  We decided to check the hard-sided meat suitcase.  I was sure that TSA was going to have a problem with this large mass of aluminum foil and plastic wrap, and our brisket was going to be confiscated.  We didn't get called back from the gate, so once we boarded the plane I focused my anxiety on the thoughts that the meat suitcase wasn't going to make the connecting flight and our plans for a barbeque feast would be crushed.

Well, I'm thrilled to report that the brisket made it safe and sound.  With all the insulation, it stayed frozen through our extended trip to our great relief.  We popped it in our freezer and began planning the special feast in which we would share the brisket with our friends.

We hosted a small dinner for a few friends this weekend to serve the special suitcase meat.  I'd never frozen barbeque before, so I wasn't quite sure how to reheat it.  We knew we would use the oven to warm it, but we wanted to be careful not to dry out the meat.  It was fully cooked, we just wanted it warm for serving.  After a bit of debate, we landed on a strategy.


We defrosted the large brisket for two days in the refrigerator.  About two hours before we wanted to eat, we unwrapped the brisket and put in a roasting pan.


It smelled absolutely wonderful with spice and mesquite smoke, and I had dogs pacing at my feet as I unwrapped it.  I combined two cups of beef broth with some of the secret spices I would have put on a brisket to barbeque, and poured it over the meat and let it pool in the bottom of the roasting pan.


Then, I covered it with foil, making sure that it was tightly covering the ends so that they would not dry out too much.  I put it in a 225 degree F oven for almost two hours.  When it was warm enough for us, my husband carved the meat and my brother started grabbing before I could take a picture.  They didn't give me a chance to take a composed picture, but I think it looks darn good.  And, it was very tasty. 

Mmmmm.....

Tuesday, May 18, 2010

Making Flour Tortillas - Final Attempt

I think I did it...I'm close to mastering flour tortillas.  I had another practice round this weekend, and I feel satisfied with my progress.  I altered the recipe just slightly and I got even closer to making them with smooth, round edges.  The rolling definitely still needs practice, but I'm getting there.

I want to express appreciation to my husband for willingly consuming all my practice tortillas, and my brother for patiently listening to me dither about ingredients and technique over and over.  What a burden they must bear.

Here's the latest scenario...

Flour Tortillas
Made 9 tortillas

2 1/2 cups of flour
1/2 tsp salt
1 1/2 tsp baking powder
1/2 cup shortening
5/8 cup warm water

Put flour, salt, and baking powder in a mixing bowl.  Then add 1/2 cup shortening and cut it in with two knives.  You take a table knife in each hand and cross them in the bowl and pull them away from each other to break the solid shortening into little pieces and mix it with the flour.  It is a concept used to make pastry.  You can also use your hands or a pastry cutter/mixer.  You want the mixture to be a little crumbly-looking, some say the texture should resemble peas.


Add the warm water a little bit at a time and use your hands to mix while doing that.  I needed to add  about 5/8 cup of water.  You might need to add a little more or less, so that is why you shouldn't just pour in the water all at once.  You want the dough to come together and be pliable, but not be too sticky or it won't roll out well.

Knead it into a ball and cover with plastic wrap.  Let the dough rest for about 15 minutes.


Heat a cast iron skillet/griddle over medium low heat.  Then, make balls of dough for each tortilla that is to be rolled.  I managed 9 this time.  Using a rolling pin, roll them out on a lightly floured surface, until they are about 1/6 inch thick.  You can push down a little harder than with piecrust, but don't over-handle or you can make the dough to tough.  I was closer to round tortillas this time.  I rolled from the center each time, and turned the roll of dough to keep myself even.  I also corrected the edges a bit with my fingers to try to make them more even.

Cook each tortilla on the hot cast iron skillet/griddle.  It take about a minute and a half on each side, and when the surface looks a little bubbly you know it is time to turn them.  Place the cooked tortillas in a towel-lined basket or wrap them in aluminum foil.  It is important to keep them warm.  They taste so much better hot.

I plan on making a big batch later this week for a special dinner we are hosting.  Wish me luck and I will share the results with you next week.

Saturday, May 1, 2010

Making Flour Tortillas - Primera Tentativa

Well, I made an initial attempt at flour tortilla making this week.  I judged them to be fair to middlin...

For the sake of honesty, this was not technically my very first attempt at tortilla-making.  I've helped others make them in the past and had tinkered a couple of times in my own kitchen, but I didn't really try very hard to understand what I was doing.  I'm a bit more motivated now since I struggle to find good tortillas locally, but crave them regularly.

I decided to consult a recipe given to me by my friend Jennifer's mother, Anita.  Jennifer hosted a tortilla-making party back in the day and Anita gave us basic lessons and Jen's dad made us all tortilla rolling pins.  I had fun and Anita was a good instructor.  Plus, she makes great tortillas.  Through no fault of this kind family, I found it exceedingly frustrating, though, because my tortillas weren't as smooth and round as the expert.  Blame it on immaturity, but I'm only just slightly more patient now.  The main thing I have going for me right now is the motivation to eat well without a friend's mother on whom I can rely.

So with my renewed sense of purpose, I pulled out Anita's recipe and dug out the rolling pin Vince made me and went to work.  Here's what I did...

Flour Tortillas
Makes about a dozen

2 1/2 cups all-purpose flour
1/2 tsp salt
1 1/2 tsp baking powder
1/4 cup canola oil
water

Add all ingredients, except water to a mixing bowl.  Mix together with hands until all is mixed well.  Little pieces start to stick together a bit.


Add warm water a little at a time until you have formed a ball of dough that is pliable but not sticky.  I added about 5/8 cup of water.  Take the dough out and knead it for a few minutes on a floured surface.  Not too much flour, though, you could dry out the dough. Then, I formed a rough ball and wrapped in plastic wrap to rest about 15 minutes.

Heat cast iron griddle or skillet over medium heat.  In the meantime, make balls of dough for each tortilla that is to be rolled.  Roll each tortilla with rolling pin as thin and round as possible.  I made 12 balls intially, but then once I started to roll them out, I decided to make them a bit larger so I ended up with about 9 tortillas in the end.  Push harder on the dough than you do pastry to really make them thin.  And, roll each time from the center and turn the dough to strive for a circle.


Mine were not perfect, as you can see, but I think practice is the key.  Or, at least that is what I'm choosing to believe.

Cook each tortilla on the griddle/skillet turning tortillas over to cook on each side.  I just slid a fork underneath to turn them.  It took about a minute on each side for it to start looking a little bubbly on top and that was my sign to flip them.

Place the cooked tortillas in a towel-lined basket or wrap them in aluminum foil in order to keep them warm.  They are best eaten quickly.


My analysis is that I think I may use shortening (Crisco solid vegetable oil) next batch to test the consistency.  I may want to add a bit more than the 1/4 cup of oil, so it is pliable without increasing the water.  And, I'm gonna keep practicing rolling round tortillas.  Stay tuned for more updates...

Wednesday, March 31, 2010

Braised Short Ribs Equals Happy Husband


As I've mentioned before, my entire family loves to cook and most of our conversations are about what we are made for dinner or what we are about to make for dinner. A few weeks ago, my dad mentioned how he had convinced my mom to make him short ribs for dinner based on a recipe in Fine Cooking magazine. (Great food porn, by the way.) He said it was one of the best things he had tasted in a long while and he encouraged me to give them a try. He also assured me that my husband would love them.

Well, he was right.

I read through the article and studied the pictures, then ad-libbed my way to a delicious dinner. My husband and I were both very happy with the results.

Here is what I did...

Braised Beef Short Ribs
(serves 2)
2 3/4 lbs beef short ribs (4 ribs)
2 Tbsp canola oil
Salt and pepper
1/2 large onion, diced
1 1/2 carrots, diced
Garlic, finely chopped, to taste
Beer
Beef broth
14.5 oz can Rotel tomatoes
Spices, to taste - oregano, chili powder, cumin

Preheat oven to 325 degrees. Heat the canola oil in a dutch oven over medium heat. Season the ribs with salt and pepper, and cook, turning with tongs until nicely browned on all sides. This will probably take 3 to 4 minutes per side. Transfer the ribs to a plate and pour off all but a thin layer of the fat from bottom of pan.

Add onions and carrots to pot. Cook, stirring and scraping up any browned bit from bottom of pan until soft and lightly browned, probably 6 or 7 minutes. Add garlic and spices, as you like, and cook, stirring, for another minute.

Deglaze the pot with beer. I used less than 1/2 cup. Pour it in, and cook, stirring to scrape up browned bits from the bottom until reduced. This took a little over a minute.

Transfer ribs back to pot. I made a mixture of beer and beef broth as my braising liquid. It was about 2 cups total and then I dumped in the can of Rotel tomatoes. Bring it all to a simmer, then cover, turn off burner, and put in the oven. Cook, turning the ribs about every 40 minutes, until they are fork tender. This took me just shy of three hours.

When it was done, transfer the ribs to a serving dish. Let the sauce and other solids sit in the pot for bit because you may need to skim off some fat. I didn't have much. Give the sauce a taste and add salt and pepper, if needed. If you like, thin the sauce with a finish of maybe 1 tsp of lemon juice or vinegar and stir. Then, spoon over ribs and serve. Mmmm...you will be quite full.


Sunday, January 31, 2010

Winter Solstice Punch for Super Bowl

My husband and I had a Super Bowl party after being snowed in for the weekend. Washington, DC has had a really tough winter. Our car was trapped in the alley behind the house, but luckily we had a friend with a four-wheel drive truck and he was willing to pick up other friends and bring them to our house.

I wanted to make our guests something special for their trouble and provide a drink that would be warming. So, when I found a recipe for Winter Solstice Punch, I knew I had a winner. This does not have a small amount of alcohol in it. Because of that, I definitely recommend serving it in small portions. It tastes really good, and your guests can start to feel it before you (or they) know it.

Winter Solstice Punch
40 oz. Tuaca liqueur
16 oz. Aperol
16 oz. Campari
24 oz. Cointreau
3 cups lemon juice
2 cups tangerine juice
1 cup Ginger Syrup

First thing you need to do is create an ice block. I used a Bundt pan filled halfway with water and sliced lemons and oranges. You should plan at least 12 hours, longer is better. It made a lovely shape once frozen.

Next make the ginger syrup. Take about a 3-inch piece of fresh ginger. Peel and cut into big chunks. Put it in a saucepan with 2 cups of sugar and 1 cup of water, stirring to combine. Bring to a gentle boil over medium-high heat. When mixture boils, reduce heat and simmer until sugar is completely dissolved and syrup is slightly thickened. This took about 3 minutes. Remove from heat, discard ginger and let cool. Refrigerate until ready to use.

Combine all ingredients in a very large pitcher and stir until well blended. I made this ahead of time and put it in the refrigerator so the flavors would meld and be thoroughly chilled.

Serve over ice in a punch bowl. Enjoy! (But not too much...)

Wednesday, August 19, 2009

Watermelon Agua Fresca


This is one of my favorite summer treats...so refreshing.


Process about 4 cups of cubed watermelon with about 1/4 cup of sugar in a blender. Seedless is best, but you will strain it later, so don't worry if you can't find a seedless melon. Blend until smooth. Pour mixture

through a fine mesh strainer, discarding solids. Stir in 2 cups of water.

Cover and chill until ready to serve. Serve over ice. I also like to add clear rum and lime slices. It makes about 5 cups.

We enjoyed drinking this several times over the summer while sitting on our porch and watching our crazy neighbors.