Friday, May 28, 2010

Guest Post: Strawberry Fields Forever. And Ever.


To cap off the week of strawberry entries, I'm pleased to have a guest posting from my friend Andrea.  Here is her take on our recent berry-picking excursion with a delicious recipe, too. 

I watched the movie Bottleshock the other night, about the beginnings of the Napa Valley wine industry. The winemakers and vineyard owners were startled that the British, Francophile wine snob (played by Alan Rickman) was willing to pay for tastings.

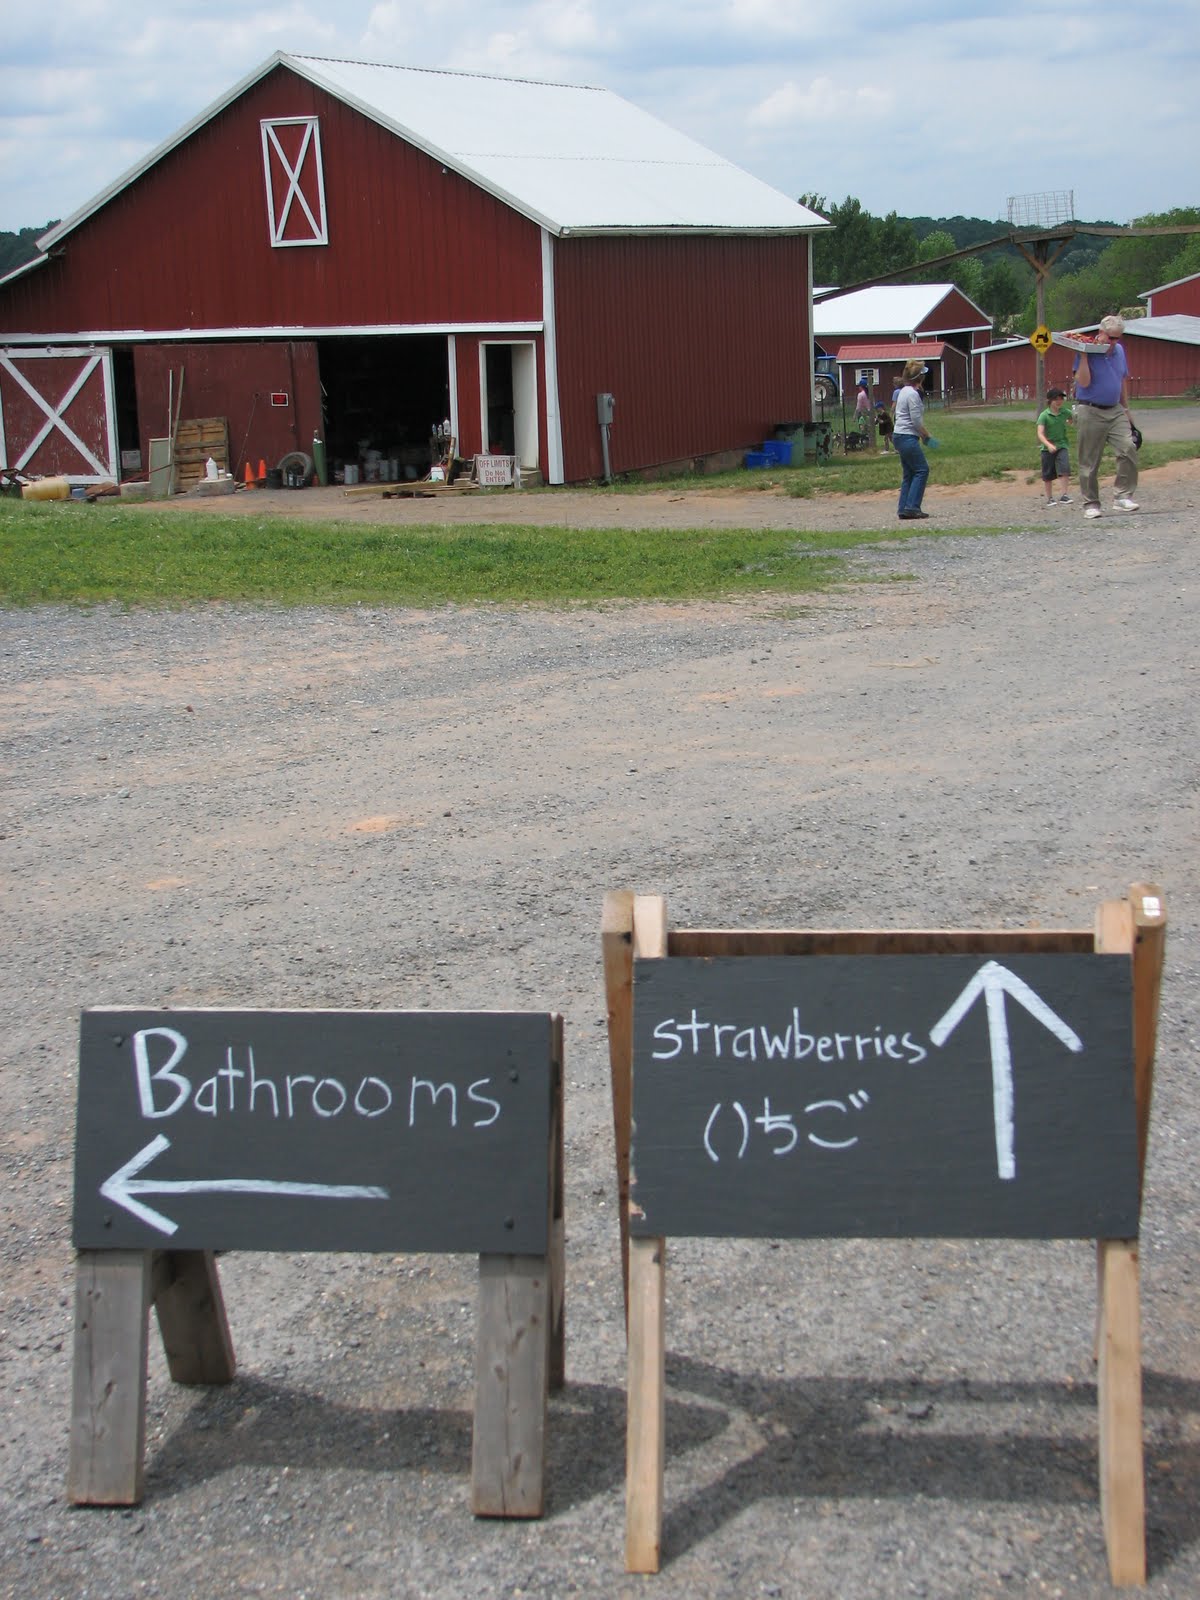
I imagine it was sort of similar the first time a farmer opened his fields for a U-pick operation. "Really? People would pay me, and do the labor? City folk, no less? Sure. Who'd fall for that?"

Fine, I'm a sucker.

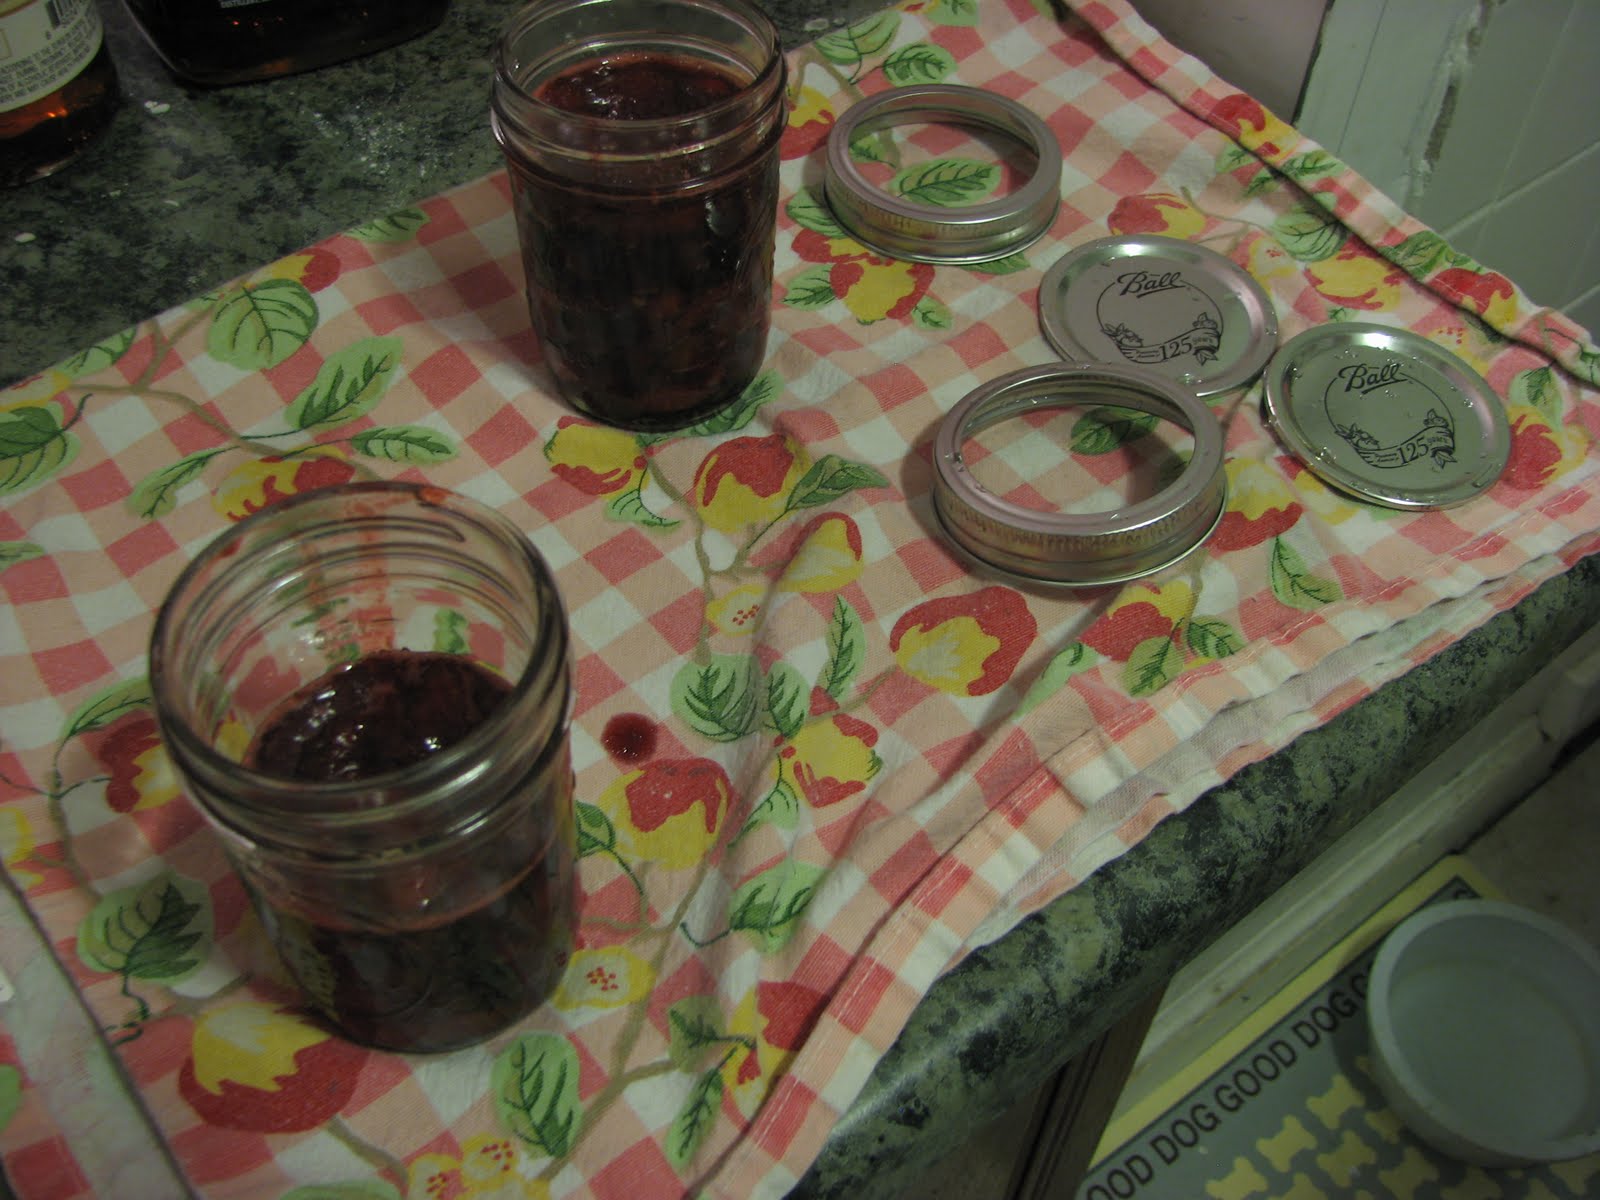
But I'm a sucker snacking on some really yummy strawberry bread...

This recipe is adapted from 
Everyday Food (http://www.marthastewart.com/recipe/strawberry-bread). Yes, Everyday Food. Perhaps this is evidence that Martha Stewart is not, in fact, the devil? (Ok, and how awesome is it that the favicon on that site is a little a picture of her face? I mean, not even Oprah tries to pull that off!)

Strawberry Bread 

(makes 1 loaf of about 10 decent-sized slices)

Cooking spray
5 tablespoons unsalted butter, softened
2 cups strawberries, rinsed, hulled, quartered, and mashed
1 3/4 cups all-purpose flour
1 teaspoon baking soda
1/2 teaspoon ground cinnamon or baking/pumpkin pie spice
1/4 teaspoon baking powder
1/4 teaspoon salt
slightly less than 1 cup sugar
2 large eggs
1/3 cup water


Preheat oven to 350 degrees. Coat an 8-by-4-inch loaf pan with cooking spray.

In a small saucepan, bring strawberries to a boil over medium heat. Cook, stirring, 1 minute. Set aside and let cool.


In a medium bowl, whisk together flour, baking soda, cinnamon, baking powder, and salt; set aside. 


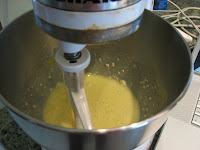
With an electric mixer, cream butter, sugar, and eggs in a mixing bowl until light and fluffy. Add flour mixture alternately with water, beginning and ending with flour. 


Fold in reserved strawberries.


Scrape batter into prepared pan, smoothing top. Bake until a toothpick inserted in center comes out clean, about 1 hour (tent with foil after 45 minutes if top is getting too dark). Cool in pan 10 minutes. Run a knife around edges; invert onto a rack. Reinvert; cool completely. 


Thursday, May 27, 2010

Spoonful of Summer

Every summer when I was growing up, my father and grandmother would make jam and preserve fruits and vegetables with me as their assistant.  I must admit that while I enjoyed spending time with them in the kitchen and I absolutely loved the results - I thought the task of canning itself was a big pain.  So many steps...and it made our Texas kitchen so very, very hot and steamy, especially my grandmother's farm kitchen with no air conditioning.  Brutal.

Fast forward many years...I've not been able to find a replication of that spoonful of summer that I could find in my family kitchens.  You just can't beat jars of jam made at home with freshly picked fruit.  Well, I decided to resolve that.  Conveniently, I had just brought home over 10 pounds of strawberries I picked myself.


The goal was to can our own fruit this summer.  First step - find mason jars and lids.  This is harder than you'd think (or at least harder than I thought) in urban Washington, DC.  My husband, my hero eventually found them early Sunday morning in a neighborhood hardware store, hidden away and high on the shelf after we made several stops the day before with no success.  We also elected not to make jam, but to try something with a bit less sugar.

Monday night, my husband and I made fresh strawberry preserves.  Yes, it made our kitchen very hot and steamy, but it wasn't as much labor as I remembered from my childhood.  Plus, it made our kitchen smell just wonderful.   I was inspired to get up and make biscuits the next morning just so we would have something on which to use the lovely red preserves.

We experimented with our recipe, and plan to make more batches in the future.  In the meantime, I thought I'd share with you what we made in this round.

Homemade Strawberry Preserves
Made six 8 oz. (half pint) jars

8 cups of fresh strawberries
4 cups of sugar
juice and zest of one orange

Combine the strawberries and sugar in a large pot and heat slowly until the juices are no longer cloudy.  It took about 5 minutes.  Remove from the heat and stir in the lemon juice and zest, then cover loosely and let stand for a few hours to macerate or pull out the sweet juice of the fruit.


While waiting, bring a large pot of water to a boil to sterilize the jars and lids.  Let them stay in the boiling water for at least 5 minutes.  Turn off the heat, but leave the jars and lids in the water until you are ready to use them.

In order to help you test the doneness of the preserves later in the process, put a small plate in your refrigerator to start it chilling.

Once the fruit is nice and juicy, scoop out 2 cups worth into a large skillet and begin cooking them over medium high heat.  When the strawberries start to simmer, start stirring regularly and let them cook about 6 minutes.  You should really smell the orange combining with the strawberries at this point.  Mmmm...wonderful.


Turn off the heat and give them a test for doneness.  Take that small plate out of your refrigerator and dribble a bit of the liquid on the plate (no more than 1/4 tsp).  Let this plate sit in the freezer for 30 seconds, pull out, and swipe your finger through the puddle.


Your finger swipe will part the liquid and expose the plate underneath.  If it starts to run together immediately, it isn't done.  So, turn the heat back on and cook for a few more minutes, then try the test again.  Our batches averaged about 8 minutes.

When you get the preserves to the right consistency, they are ready for jars.  Ladle the jam into sterilized jars, filling to within 1/4 inch of the rims.


Cover each jar with a lid and fasten the ring tight.  Set aside and repeat the process with the remaining strawberries and juice.  I found it easier to control the heat and things went faster if I made them in small batches of 2 cups at a time.


Once you've filled all the jars, put them back into boiling water, making sure they are completely submerged.  Cook for about 10 minutes and then lift the jars from the bath.  As they cool down, you should hear a pinging noise as the lids pop from a vacuum forming.  After a couple of hours, press down on the center of each lid.  There should not be any flex.  If the lid flexes, repeat the process and re-submerge the jars in boiling water for 10 minutes to reach the vacuum seal.

Wednesday, May 26, 2010

Happy Hour with Strawberries and A Cool Website about Alcohol

It can be fairly easy to bring a smile to my husband's face - he's just an upbeat person.  But the grin he had last night as he walked in the door and saw me mixing cocktails could have lit the house.  He's so cute.

If you recall, we try to have a happy hour at home at least once a week.  Last night I decided to mix up a cocktail with some of our plentiful strawberries.  Then I remembered the mint our friend Wendy brought us on  Sunday and I had a brainstorm.  Mojitos with strawberries, mint, and lemon...

Strawberry Mojito
Makes 1 tall glass

2 to 3 fresh stawberries - washed, stemmed, and chopped into bite-size pieces
2 to 3 fresh mint leaves
1 small wedge of lemon
2 tsp (or to taste) of simple syrup
2 oz (or to taste) of light rum
4 oz (or to taste) of lemon seltzer
crushed ice

Drop the strawberries, mint, and lemon wedge in the bottom of a glass.


Muddle or "smush" with a spoon to slightly crush the ingredients and release the juice of the fruit and essence of mint leaves and lemon peel. Add simple syrup and do more of the same to infuse those flavors into syrup.

Pour in rum and slightly stir.  Add crushed ice and mix gently with spoon.  Top with lemon seltzer and serve.  Mmmm...refreshing.


NOTES:  My husband makes a batch of simple syrup for us to keep in the fridge.  He steeped the last one with some mint leaves, and it worked well in this cocktail to provide an additional level of minty flavor.  You may want to use this technique or add a bit more mint leaves to your muddling mixture.

I also liked the extra layer of lemon from the seltzer.  You could elect to use plain seltzer or club soda.  The fizz is a nice touch, so stick with bubbly.

You could also switch to lime, if you prefer, but I thought the lemon would not compete so much with the strawberries.  Regardless, have fun mixing and experimenting.

Now, about that cool website...

How does that song go?
"When I'm not drinkin', I think about drinkin'.  When I'm not thinkin', I drink about you..."

If you are like me, you enjoy drinking, you enjoy reading, and you really enjoy reading about drinking.  So, if that is the case, I encourage you to visit a cool website known as AlcoholReviews.com.


The founder and editor, Kevin R. Kosar has a witty style and he shares lots of neat tidbits of interest to drinkers.  And, I'm proud to say he also generously gave me a shout out about our visit to Copper Fox Distillery earlier this month.  I encourage you to visit his site and keep thinkin' about drinkin'.

Tuesday, May 25, 2010

Strawberry Fields Forever

If you've been reading this blog for a while, you know that I've been anxiously awaiting the start of the warm weather growing season.   Fruit just tastes so much better when you pick it yourself or at least buy it from the farmer who recently picked it.

I made my first farm trip of the year this weekend when I picked strawberries with my friends Andrea and Christina.  We visited Homestead Farms in Poolesville, Maryland and I had a great time.


It has become a bit of tradition for us, and we have made the trip several times over recent years.  The farm is not far out of Washington, DC in Montgomery County, and has a variety of produce throughout the spring, summer, and fall.   We have a nice visit in the car, and then share ideas of how to use the fresh fruit.

It has become a pretty popular place with families, especially with an expanded petting area with goats and a calf, and a hayride to the picking fields.


Each season, we hear more languages spoken as immigrant families bring their kids to the farm, too.  This year we realized the farm is responding to this expanded clientele and we noticed a sign in what we think is Korean.  Neat,  huh?


The farm has a store to sell other kinds of produce and a kitchen that makes goodies with the fresh fruit.  Our favorite is the strawberry smoothie.  It wasn't quite as good this year.  I fear they may be responding to their clientele in another way by making the smoothie lighter in calories instead of rich in cream that coats your tongue with a slickness as you gulp down chunks of strawberries.  Sigh.  Don't worry I still drank it all, though.


I went a bit crazy this year in my picking....I came home with over 10 pounds of strawberries.


It was a gorgeous day and the berries were plentiful, so it was easy to get carried away.  The smell of freshly picked strawberries is just heavenly, and it made the car ride home even more cheery.


I have big plans for them, so I'm not worried about using them all.  In fact, you should expect to read multiple entries about strawberries in the coming days.  I hope Andrea will share her recipe for strawberry bread so I can try it out.

Our first treat, though, was strawberry cream popsicles.  I thought they would make a nice dessert after our heavy meal of beef brisket.  Plus, we could use the new popsicle molds my husband and I got from my parents for Christmas.  It was my first time to make popsicles from fresh fruit, and I imagine I will continue to tinker with the recipe, but here is what I did this time.

Homemade Strawberry Cream Popsicles
Made 6 popsicles, using Tovolo brand molds

2 1/2 cups of stemmed and chopped fresh strawberries
1/3 cup sugar
1/2 cup milk
1/2 cup plain yogurt


Mix all ingredients in a blender or food processor until fruit is pureed and all is well blended.  A blender is best, but I had to use our food processor since our neighbor borrowed our blender late one night for some boozy margarita fun.  The processor will work in a pinch.  Pour the blended mixture into molds, insert sticks, and place in freezer until firm.  You should allow at least 8 hours.

This is really easy, so I encourage you to experiment with the process and different fruits.  You can adjust the sugar to your taste and use all milk, instead of a combination with yogurt to equally delicious results.

A note on the lack of preciseness: I don't have a kitchen scale yet, so I couldn't weigh the strawberries.  Because of that, this recipe is not exact.  I mean, we each cut our strawberries slightly differently and they contain different amounts of liquid so just consider this a rough proportion.


In case you were wondering, here are the popsicle molds we used...


Monday, May 24, 2010

Suitcase Meat

On our trip to Texas in April, my husband and I decided to bring back some of the foodstuffs that we can't get here in DC.  The most important item for us was barbeque beef brisket.  Not only can we not get large beef briskets at good prices, but we also don't have a smoker.  We had a craving as we had not had good barbeque since our wedding in October, and our friends were clamoring for us to bring some barbeque back.

So, on the first day of our trip, we purchased a 12 pound beef brisket at HEB.  My dad seasoned it and smoked it for several hours over mesquite wood.


Then, we wrapped the cooked brisket carefully and placed it in the freezer it for the remainder of our trip.  The next step was insuring safe passage and TSA allowance.  After several hours of research and a call to the airline, we decided that we would wrap the brisket in plastic, pad it with styrofoam, and pack it in a hard-sided suitcase.  With a trip to Goodwill, we scored a large American Tourister suitcase for 9 bucks.

We made sure it was frozen solid before packing and well insulated and padded for travel.  I was a nervous wreck for the entire trip home.  We decided to check the hard-sided meat suitcase.  I was sure that TSA was going to have a problem with this large mass of aluminum foil and plastic wrap, and our brisket was going to be confiscated.  We didn't get called back from the gate, so once we boarded the plane I focused my anxiety on the thoughts that the meat suitcase wasn't going to make the connecting flight and our plans for a barbeque feast would be crushed.

Well, I'm thrilled to report that the brisket made it safe and sound.  With all the insulation, it stayed frozen through our extended trip to our great relief.  We popped it in our freezer and began planning the special feast in which we would share the brisket with our friends.

We hosted a small dinner for a few friends this weekend to serve the special suitcase meat.  I'd never frozen barbeque before, so I wasn't quite sure how to reheat it.  We knew we would use the oven to warm it, but we wanted to be careful not to dry out the meat.  It was fully cooked, we just wanted it warm for serving.  After a bit of debate, we landed on a strategy.


We defrosted the large brisket for two days in the refrigerator.  About two hours before we wanted to eat, we unwrapped the brisket and put in a roasting pan.


It smelled absolutely wonderful with spice and mesquite smoke, and I had dogs pacing at my feet as I unwrapped it.  I combined two cups of beef broth with some of the secret spices I would have put on a brisket to barbeque, and poured it over the meat and let it pool in the bottom of the roasting pan.


Then, I covered it with foil, making sure that it was tightly covering the ends so that they would not dry out too much.  I put it in a 225 degree F oven for almost two hours.  When it was warm enough for us, my husband carved the meat and my brother started grabbing before I could take a picture.  They didn't give me a chance to take a composed picture, but I think it looks darn good.  And, it was very tasty. 

Mmmmm.....

Friday, May 21, 2010

Smoke Gets In Your Eyes

Our tour of the whiskey distillery got me thinking about wood.  No, not that kind of wood.  I mean, how wood instead of peat can be burned so smoke flavors the malt and wood chips are used to age and flavor the spirits.  It reminded me of the importance of smoke in barbeque. 

Even though barbeque meat is seasoned with spice rubs, basted or mopped with liquids, and plunged in sauce, its dominant flavor is smoke.  Depending on the wood burned, the smoke can be sweet or acrid, fruity or resinous.  The word barbeque even comes from the Spanish word barbacoa, which means a grid of green (fire resistant) sticks on which food is placed high above a fire to smoke.

Hardwoods have sugar molecules that produce aromas and proteins which contribute to roasted flavors.  Most softwoods, like pines and firs, have significant quantities of resin that produce a harsh tasting soot when burned.  This is not preferential for smoking food.  So, don't use your Christmas tree in the barbeque pit.  Since different species of trees have different amounts of these sugars and proteins, they impart different flavors to food.  The temperature at which wood burns can also impact cooking with smoke.  The ideal is low, smoldering temperatures for wood in your barbeque cooker.  Because some hardwoods burn so hot, pitmasters sometimes choose to lower the combustion temperature by soaking wood chunks in water before placing them on a fire.

Some common woods used in smoking are:
  • Alder – light, aromatic smoke; preferred for salmon
  • Apple and Cherry – sweet, fruity smoke; great with poultry and pork
  • Hickory – strong, full-flavored smoke; popular with ribs, pork shoulder, bacon, and turkey
  • Maple – sweet and fragrant smoke; goes well with chicken and full-flavored fish
  • Mesquite – heavy smoke with a pungent flavor; works best with beef and sausage
  • Oak – good all-purpose smoky flavor, not as strong as hickory or mesquite and never bitter
  • Pecan – rich, fragrant, mellow smoke; won’t overpower delicate seafood
 Mesquite is my favorite wood for barbeque and it imparts a very strong flavor to meat.  Because of that, it works best with meats that have an equally strong flavor, like beef or wild game, but I like it with everything.  I find it bit sweet and very aromatic.  It is also the most common wood used in Texas barbeque. 

My dad uses mesquite in his cooking.  When my brother and I were kids, we regularly helped him scrounge pieces from nearby ranches before our barbeques because the trees are considered a nuisance.  Ranchers aren’t too fond of mesquite trees because they compete with grass for moisture, and cattle need grass.  Right now, my dad has a plentiful supply since Hurricane Dolly knocked out several mesquite trees and he was able to chop them up and stash them my his barbeque cooker.

Thursday, May 20, 2010

Grilling is Not Barbeque

In case you can’t tell I’m a huge fan of Texas barbeque.  I’ve decided it is both a science and an art.  I figure if I can better understand the science behind good tasting meat, I can begin to cultivate the art of great tasting barbeque.

Real Texas barbeque can’t happen on a gas grill.  Grilling is fast cooking over high heat, while barbequing is slow cooking over low heat.  Typically, gas grills cannot maintain a low enough temperature for proper slow cooked barbeque. 

Smoke is the key.  

A gas grill cannot match the flavor imparted to food from wood or charcoal smoke.  During grilling, the meat is exposed to air, but during barbequing or smoking the BBQ lid or smoker door is closed, enveloping the meat in a thick cloud of smoke.   Mmmm...can't you just smell it?  Many barbeque pits have a system of vents that can be opened or closed to control the amount of heat and smoke that contact the food.  The smoke must be able to move freely around the meat and out of the top of the smoker/cooker/pit quickly so that creosote will not build up on the meat and give it a bitter flavor.  Sometimes a pan of water in also placed in the cooking chamber to provide steam.


Smoked meats such as Texas barbeque usually still have a red tinge to them, even when completely cooked and will have what is known as a smoke ring - a thin pink layer around the edges.  This coloring of the meat is caused by a reaction between the carbon monoxide of the smoke binding with the iron in the myoglobin of the meat.  How about that word, huh?  Myoglobin, in case you were wondering, is the oxygen-binding protein in muscle.

Tender cuts of meat are best for grilling, but they require close attention. Vegetables and fruits can also be grilled because they don't need a long cooking time either.  The quick cooking and the high heat work to seal in the juices, but if you leave the meat on too long it can dry out.  This can happen with any dry cooking method, however, it is best not to walk away from your grill. Sauces can be used, but with such high heat, it is better when added near the end of the cooking time, so they won’t burn.

Tougher cuts of meats, such as beef brisket (my favorite) or pork ribs, are usually used in barbeque. These meats benefit from the long, slow cooking process that softens the thick connective tissue surrounding the muscle fibers.   The meat can become so tender it can fall off the bone. Since the heat is not as high as grilling, barbeque sauce can be brushed onto the meat throughout the cooking process, if desired.

This is the first of several installments about Texas barbeque.  Stay tuned for an entry on wood smoke – the flavor of barbeque.


Wednesday, May 19, 2010

American Craft Beer Week

Did you know that this is American Craft Beer Week?  Or as it also known...the Mother of All Beer Weeks.  According to the US House of Representatives, craft brewers are important to our communities and benefit the economy.  They even passed a resolution in support of American Craft Beer Week.  Fun, huh?

This week is the perfect time to check out a local brewpub near you.  Many of them are running specials or tasting menus or even tours.  I know my husband and I are going to check some out.  Plan ahead for your end of week happy hours or dates.

You are also encouraged to sign the Declaration of Beer Independence, a document to support America's small and independent craft brewers.

Now, Virginia and I need to plan what beer we are going to craft...

Tuesday, May 18, 2010

Making Flour Tortillas - Final Attempt

I think I did it...I'm close to mastering flour tortillas.  I had another practice round this weekend, and I feel satisfied with my progress.  I altered the recipe just slightly and I got even closer to making them with smooth, round edges.  The rolling definitely still needs practice, but I'm getting there.

I want to express appreciation to my husband for willingly consuming all my practice tortillas, and my brother for patiently listening to me dither about ingredients and technique over and over.  What a burden they must bear.

Here's the latest scenario...

Flour Tortillas
Made 9 tortillas

2 1/2 cups of flour
1/2 tsp salt
1 1/2 tsp baking powder
1/2 cup shortening
5/8 cup warm water

Put flour, salt, and baking powder in a mixing bowl.  Then add 1/2 cup shortening and cut it in with two knives.  You take a table knife in each hand and cross them in the bowl and pull them away from each other to break the solid shortening into little pieces and mix it with the flour.  It is a concept used to make pastry.  You can also use your hands or a pastry cutter/mixer.  You want the mixture to be a little crumbly-looking, some say the texture should resemble peas.


Add the warm water a little bit at a time and use your hands to mix while doing that.  I needed to add  about 5/8 cup of water.  You might need to add a little more or less, so that is why you shouldn't just pour in the water all at once.  You want the dough to come together and be pliable, but not be too sticky or it won't roll out well.

Knead it into a ball and cover with plastic wrap.  Let the dough rest for about 15 minutes.


Heat a cast iron skillet/griddle over medium low heat.  Then, make balls of dough for each tortilla that is to be rolled.  I managed 9 this time.  Using a rolling pin, roll them out on a lightly floured surface, until they are about 1/6 inch thick.  You can push down a little harder than with piecrust, but don't over-handle or you can make the dough to tough.  I was closer to round tortillas this time.  I rolled from the center each time, and turned the roll of dough to keep myself even.  I also corrected the edges a bit with my fingers to try to make them more even.

Cook each tortilla on the hot cast iron skillet/griddle.  It take about a minute and a half on each side, and when the surface looks a little bubbly you know it is time to turn them.  Place the cooked tortillas in a towel-lined basket or wrap them in aluminum foil.  It is important to keep them warm.  They taste so much better hot.

I plan on making a big batch later this week for a special dinner we are hosting.  Wish me luck and I will share the results with you next week.

Monday, May 17, 2010

Roll Out the Barrels

A few weeks ago I went out to dinner with my friends Andrea and Christina and we noticed a display for a mini-barrel of whiskey paired with a bottle of clear alcohol.  It was a "kit" to age your own whiskey.  Well, sign me up!  Given that my husband and I, my brother, and many of our friends really enjoy whiskey, I knew this was something I needed to investigate.  So, I took a flyer home and visited their website.

Sure enough, Washmund's Copper Fox Distillery not only offer tours, but will sell you various sized barrels to hold your single malt spirits.  You control the aging and can influence what flavors the whiskey during that time.  How cool is that?

My husband and I decided to pay them a visit this weekend and pick out our own barrel.  Drive towards the Blue Ridge Mountains to the town of Sperryville, Virginia, turn down the dirt-covered River Road, and you will see the Copper Fox Distillery, just across from an antique store.

Founded by Rick Wasmund; his mother, Helen; and his friend Sean McCaskey, Wasmund's Copper Fox Distillery produces a unique single-malt whiskey.  We parked out front and wonderful aromas of fruit, smoke, toasted wood and barley greeted us at the door, along with a brown and grey tabby cat...Rick and Sean were also working and agreed to give us a tour.


We started in the malt room.  Wasmund's is the only distillery in North America to malt their own barley, thereby controlling the flavor of the whiskey from beginning to end.  They use Virginia grown winter barley delivered by the farmer.  The kernels are poured into a special tank, where they soak in well water for three days or so.

This begins the process of malting - the barley is encouraged to germinate, but is stopped before a new barley plant starts to grow.  An enzyme in the barley converts its starch to sugar.  To make sure the grain gets air and light, it is spread on the clean concrete floor of the malting room, where raking multiple times a day keeps all sides exposed and prevents clumping.  Wasmund's mother, the "Manager of Malt" oversees this part of the operation.

The next step is to move the barley to the kiln for drying.  The enclosed kiln has two levels, a lower one with a wood burning stove that burns oak, apple, and cherry woods.


Smoke and heat drifts up through a perforated metal floor that is the second level.  Spread across that floor is the barley.  The grain is dried over this gentle fire that halts the growth that would use up stored energy and flavors it with fruit wood smoke.


After several days of drying, the barley is stored in sacks until needed.  They make whiskey year-round, but they only malt during the fall and winter due to the heat.  We saw the last batch until cooler weather returns.

The barley is then milled into flour.  This is mixed with heated water to create a wort which is then pumped into a steel fermenting tank, where yeast is added.


The yeast consumes any sugar to make alcohol.  After a few days fermentation, this mash is basically beer without any hops.  The mash is then twice run through a copper still with a closed steam system and a condenser to obtain grain alcohol.


The spirit is then filled into used oak bourbon barrels.  The barrels are stored standing on end, not horizontally.  A hole is cut into the top of each barrel and through that chunks of toasted wood (cherry and apple) are suspended.  Wasmund calls this process chipping.  The chunks of wood apparently accelerate the aging of the whiskey and contribute to the delicious and unique flavor and scent.


Wasmund starts the tour by claiming to be trained in whiskey-making by aliens - his use of fruitwood is that unique.  The truth is he interned in a distillery in Scotland, but the use of fruitwoods in both the malting and aging makes his whiskey unlike any other.

When finished, it is bottled, sealed, waxed, and numbered all by hand.


Wasmund's whiskey is now available in 17 states, and they produce over 100 cases per month.  The distillery also just started brewing a rye whiskey.  I recommend you give them a try; I am trying to get the bottles in a few more bars here in DC.

The fruitwood helps mellow the drink, but it still has quite a kick.  It is tasty consumed neat, but I also think it will make some lovely cocktails.

I will share the process of setting up our barrel to age whiskey soon.  Stay tuned!

Friday, May 14, 2010

The Cleveland Cavaliers and Comfort in Food

My gorgeous friend Kristina is a bit under the weather this week, so my husband and I decided to make some food for her and her husband.  We just wanted them to have a hassle-free evening with something tasty and easy in the refrigerator waiting for them.  The most comforting choice?  A casserole with macaroni, tomatoes, ground beef, and lots of gooey cheese.

It was very easy and we made it up as we went along.  We made enough to not only give them a casserole, but keep one for ourselves as well.  And, I was very grateful that was the case when we decided to have some folks over to watch the Cavaliers basketball game.  It made for a very easy dinner for our guests.  We just popped that casserole in the oven, chopped a few veggies for a salad, slathered some garlic butter on a baguette, and whipped up some brownies.

And, oh, did we need some comfort in our house.  Needless to say, the game did not go as we had hoped, but dinner was just what we wanted.

Comforting Casserole
1 Tbsp each, canola oil and olive oil
1 onion, diced
2 cloves garlic, minced (adjust to suit your taste)
2 1lbs ground beef (you could substitute turkey, if you prefer)
24 oz can of whole tomatoes (you could replace with diced, if you prefer)
15 oz can of tomato sauce
1 1/2 tsp oregano
1 tsp chili powder
salt and pepper, to taste
1 lb (1 box) of macaroni (you could replace with another compact pasta)
3/4 cup cheddar, shredded
3/4 cup mozzarella, shredded

Heat the mixture of canola and olive oils in a large skillet over medium heat.  Add the onion and cook until no longer opaque.  Add the garlic and in less than a minute so the garlic doesn't burn, add the meat to the skillet.  Slightly brown the meat and break it up into crumbles.


Add the whole tomatoes, breaking them slightly, juice and all.  Add the tomato sauce and spices.


Stir and turn down heat.  Let it simmer until it thickens, it took about half an hour to get to the consistency we prefer.

Meanwhile, follow the directions on the box of pasta and boil until preferred consistency.  Drain the noodles and place in the bottom of a casserole dish.  We had enough pasta for two casseroles - a 9 x 13 and a 8 x 8.  Pour or ladle the meat sauce on top of the pasta.


Then top with the mixture of cheese.

You can bake it right away in a 400 degree F oven for about 30 minutes or until the cheese looks a little brown and bubbly.  Or, you can refrigerate for no more than 3 days (or freeze for no more than a week) while covered.  If you want to freeze it, I suggest you don't add the cheese until you are ready to bake.


VARIATIONS: This would also be good with various vegetables (think bell pepper or zucchini), different cheeses, other spices, or other flavorings like mushrooms.  Experiment with ingredients you or your lucky recipient will enjoy.

Thursday, May 13, 2010

Beer Review: Sam Adams Coastal Wheat

Have you tried this yet?

samuel adams coastal wheat png


The Coastal Wheat is part of the Sam Adams Brewmaster's Collection.  Brewed in the Hefeweizen style, it is a nice addition to our drinking options as the weather warms.  I found the flavor pretty balanced between sweet and tart with a strong lemony flavor, and I detected just a hint of pineapple in the sweet character.  It is a pale wheat with a lovely yellow color, and is not as cloudy as some hefeweizens.

I enjoyed it in a pint glass and it pairs well with food.  I recommend you give it a try for your next cookout.